Materials and tools
• Yarn:
– Alize Cotton Gold 100g/330m, color #385 (pistachio), #55 (white)
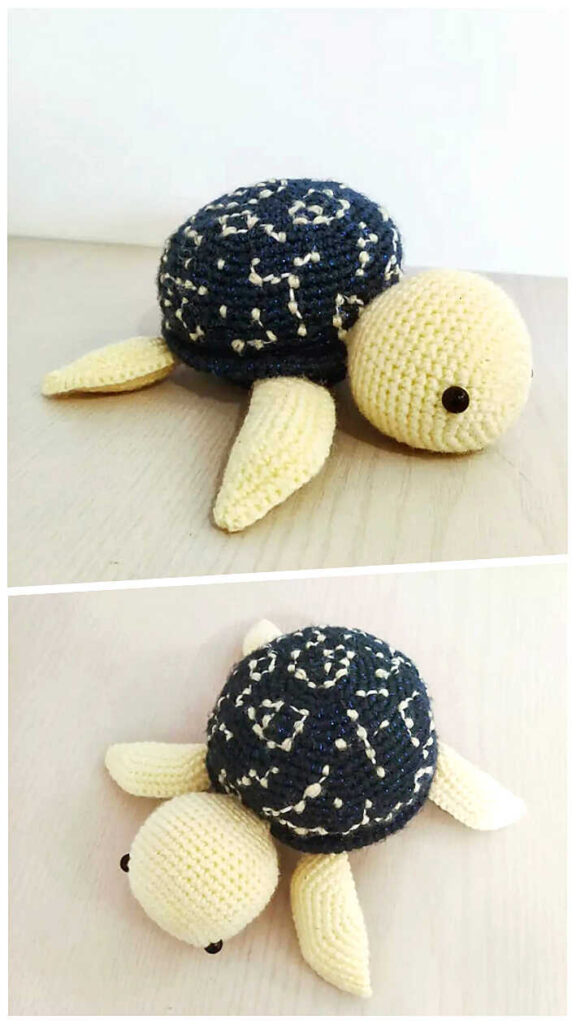
– YarnArt Jeans 50g/160m, color #40 (brown), #54 (navy blue)
• Hook number 2
• Filler – holofiber
• Beads for eyes with a diameter of 6 mm
• Thick sewing needle, scissors, pins, knitting marker
• A little black, white, pink thread for embroidery of the muzzle
• Buttons with a diameter of 6mm, satin ribbon – for decor
Abbreviations
MR- Magic ring
Sc- Single crochet
Ch- Chain
Inc- Increase
Dec- Decrease
Sl st- Slip stitch
Dc- Double crochet
BLO- Back loop only
FLO- Front loop only
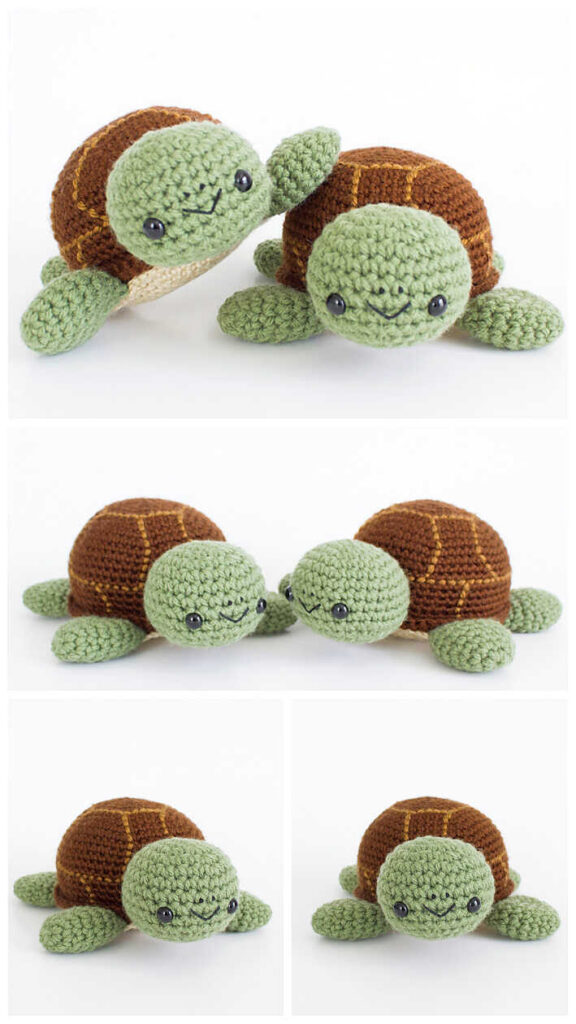
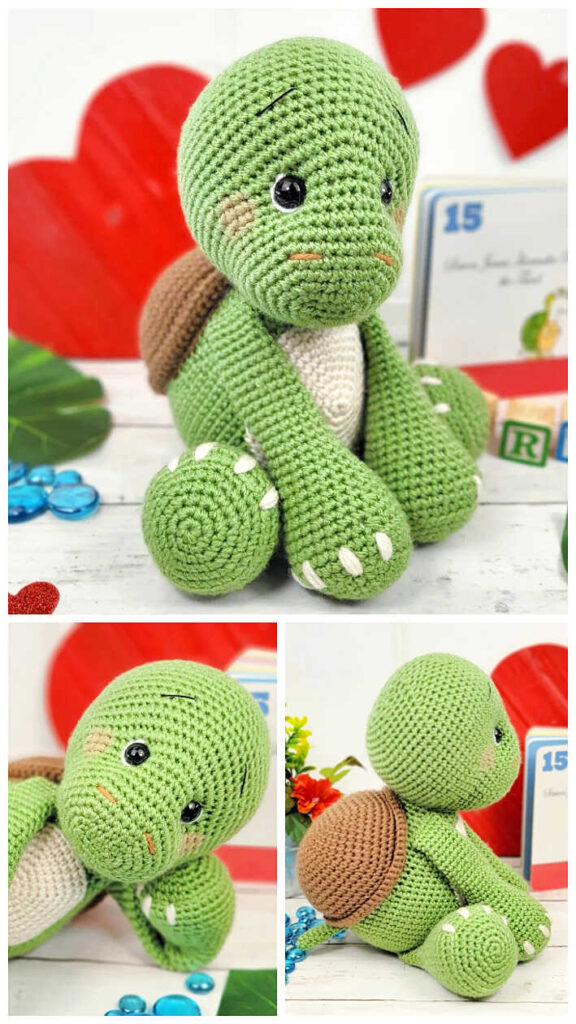
Using the specified materials, the size of the finished crochet amigurumi toy is approximately 13.5 cm.
Head
Stuff tightly while crocheting.
Rnd 1: 6 sc in MR
Rnd 2: inc in each loop (12sc)
Rnd 3: (1sc, inc)*6 (18sc)
Rnd 4: 1sc, inc, (2sc, inc)*5, 1 sc (24sc)
Rnd 5: (3sc, inc)*6 (30sc)
Rnd 6: 2sc, inc, (4sc, inc)*5, 2sc (36sc)
Rnd 7: (5sc, inc)*6 (42sc)
Rnd 8: 3sc, inc, (6sc, inc)*5, 3sc (48sc)
Rnd 9-16: 48sc (8 row)
Rnd 17: 3sc, dec, (6sc, dec)*5, 3sc (42sc)
Rnd 18: (5sc, dec)*6 (36sc)
Rnd 19: 2sc, dec, (4sc, dec)*5, 2sc (30sc)
Rnd 20: (3sc, dec)*6 (24sc)
Rnd 21: 1sc, dec, (2sc, dec)*5, 1sc (18sc)
Fasten and cut the thread, hide the tip of the thread inside the head.
Body
Start crocheting with pistachio color. Stuff firmly in the process knitting.
Rnd 1: 6 sc in MR
Rnd 2: 6 inc (12sc)
Rnd 3: (1sc, inc)*6 (18sc)
Rnd 4: 1sc, inc, (2sc, inc)*5, 1sc (24sc)
Rnd 5: (3sc, inc)*6 (30sc)
Rnd 6: 2sc, inc, (4sc, inc)*5, 2sc (36sc)
Rnd 7: (5sc, inc)*6 (42sc)
Rnd 8-11: 42sc (4 rows)
Change the thread color to white cut the pistachio thread.
Rnd 12: 42sc
Rnd 13: behind the back wall of the loop 42sc
Change the color of the thread to dark blue, do not cut the white thread.
Rnd 14: (5sc, dec)*6 (36sc)
Rnd 15: 36sc
Change the thread color to white.
Rnd 16: 36sc
Rnd 17: 2sc, dec, (4sc, dec)*5, 2sc (30sc)
Change the thread color to dark blue.
Rnd 18-19: 30sc (2 rows)
Change the color of the thread to white, cut off the dark blue thread.
Rnd 20: (3sc, dec)*6 (24sc)
Rnd 21: 24sc
Change the color of the thread to pistachio, cut off the white thread.
Rnd 22: 1sc, dec, (2sc, dec)*5, 1sc (18sc)
Rnd 23: 18sc
Fasten the thread, cut, leaving a long end for sewing.
Arms (Make 2)
Tie two pieces. Stuff approximately to the middle (the top part does not need to be stuffed). Start crocheting in brown.
Rnd 1: 6 sc in MR
Rnd 2: 6 inc (12sc)
Rnd 3: (3sc, inc)*3 (15sc)
Change the thread color to pistachio, Cut off the brown thread.
Rnd 4: behind the back wall of the loop 15 sc
Rnd 5: 15 sc
Rnd 6: dec, 6sc, dec, 5sc (13sc)
Rnd 7: 13 sc
Rnd 8: dec, 5sc, dec, 4sc (11sc)
Rnd 9-11: 11 sc (3 rows)
Rnd 12: dec, 4sc, dec, 3sc (9sc)
Work 4 more sc (or whatever number of sc you need to so that when sewing on the handle, the color change is on the inside).
Fold the edges of the part together, crochet 4sc.
Fasten the thread, cut, leaving a long end for sewing.
Legs (Make 2)
Tie two pieces. tight fill in the process of crocheting, fill the top a little weaker (so that the legs are not strong stuck out when sewing). Start crocheting in brown.
Rnd 1: 6 sc in MR
Rnd 2: 6 inc (12sc)
Rnd 3: (1sc,inc)*6 (18sc)
Change the color of the thread to pistachio, cut off the brown thread.
Rnd 4: behind the back wall of the loop 18 sc
Rnd 5: 18 sc
Rnd 6: (dec, 7sc)*2 (16sc)
Rnd 7: 16sc
Rnd 8: (dec, 6sc)*2 (14sc)
Rnd 9-11: 14sc (3 rows)
Rnd 12: (dec, 5sc)*2 (12sc)
Rnd 13-15: 12sc (3 rows)
Rnd 16: (dec, 4sc)*2 (10sc)
Rnd 17: (dec,3sc)*2 (8sc)
Fasten the thread and cut, leaving a long tip, with which pull off the remaining hole. Hide the tail of the thread inside the legs.
Design and assembly
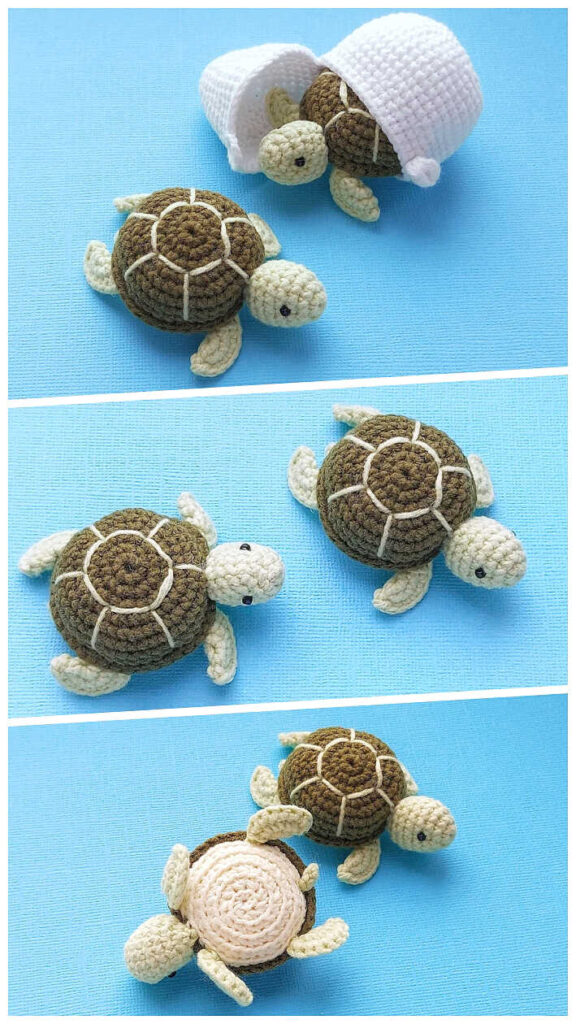
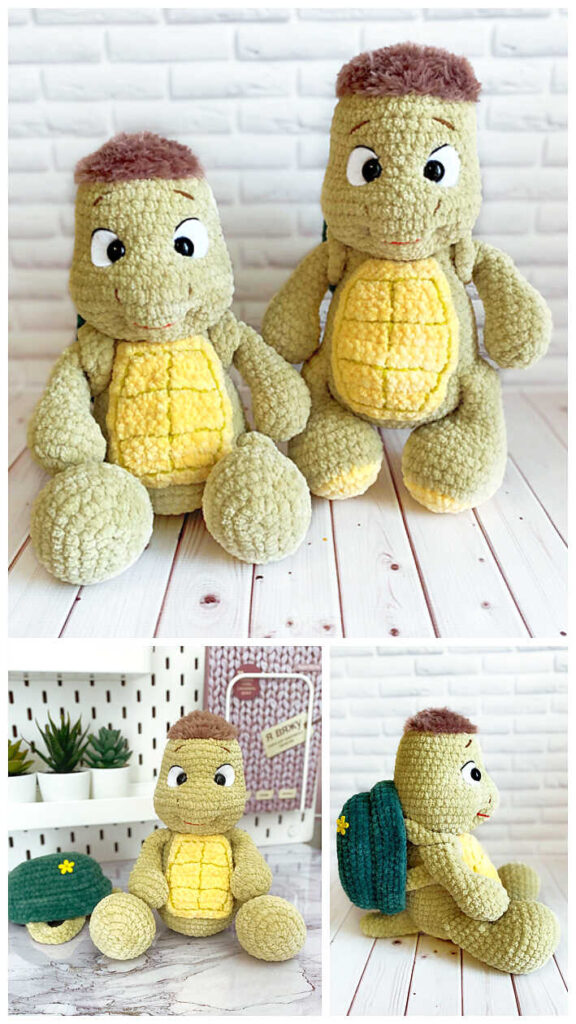
Make a muzzle. First, make tightenings, focusing on the photo. For this mark with pins the location of the peephole (in the photo stitch 1 and 2), which are located between 12 and 13 side by side, the distance between the stitch is 8sc. Visually mark stitch 3 and 4 which are located on a distance of 1sc from stitch 1 and 2, respectively.
Insert a long needle and thread into the base of the head and bring it out into stitch 1. Then insert the needle into stitch 3 and bring to the base of the head. For strength can be repeated tightening one more time.
Do the same for the second eyes, but in this case from the base head, bring the needle out at stitch 2. Then insert the needle at stitch 4 and bring it back to the base. Pull the ends and tie a knot.
Sew on eyes in places of tightening – beads. Make white thread stitches around the peephole to look became more “alive”. Above embroider with black thread eyebrows, pink – cheeks (below eye level, between 14 and 15 nearby).
Pin the head to head.
Sew firmly in a circle, and when there will be a small hole add more filler between head and neck, then sew up to end.
Between 6 and 7 next to the torso mark the places where legs are located. Sew them on with using a thread fastener. In use the same as a thread yarn with which the body was crocheted.
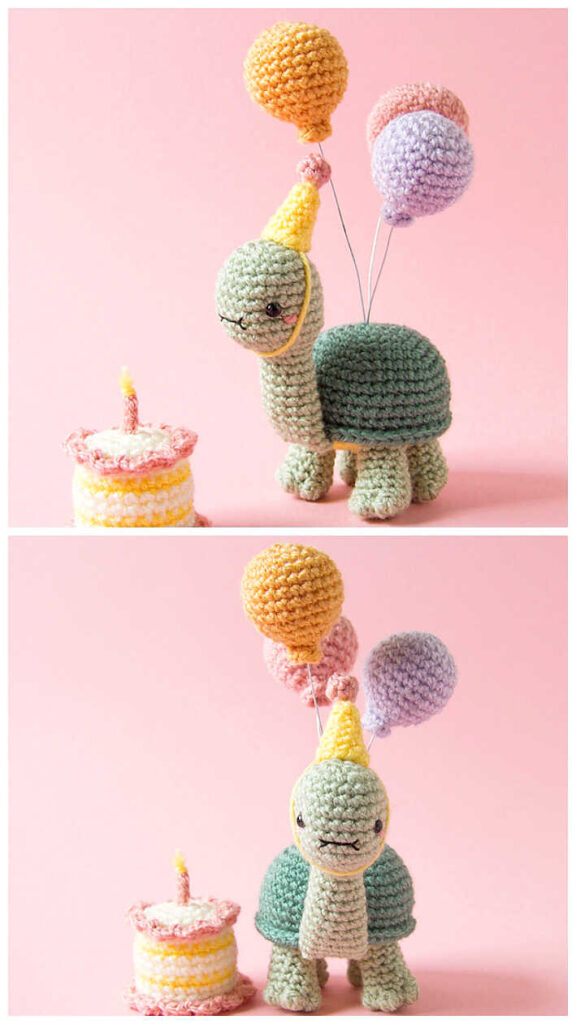
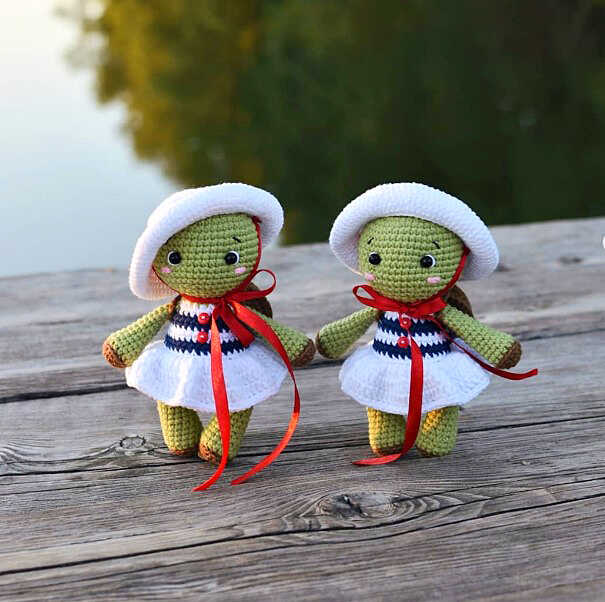
Skirt
Attach a white thread and crochet for the front half loops of the 12th row. Crochet in a circle, each row starting with lifting loops and ending with sl-st.
Rnd 1: 3ch, inc from dc in each loop (84 dc)
Rnd 2-3: 3ch, 84 dc (84 dc)
Rnd 4: 1ch, 84sc (84sc)
Fasten the thread, cut off, hide the tip of the thread.
Between 20 and 21 side by side sew the handles symmetrically.
Sew on front for decoration. Decorative buttons.
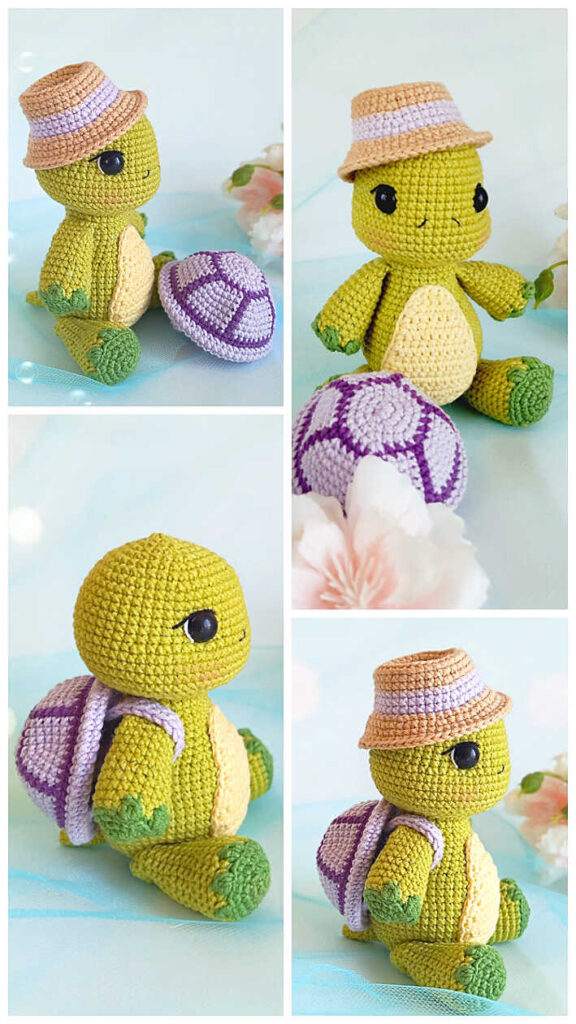
Shell
Bottom part:
Rnd 1: 6 sc in MR
Rnd 2: 6 inc (12sc)
Rnd 3: (1sc, inc)*6 (18sc)
Rnd 4: 1sc, inc, (2sc, inc)*5, 1sc (24sc)
Rnd 5: (3sc, inc)*6 (30sc)
Rnd 6: 2sc, inc, (4sc, inc)*5, 2sc (36sc)
Rnd 7: (5sc, inc)*6 (42sc)
Finish crochet sl st, fasten the thread, cut off, hide the tip of the thread.
Top part:
Rnd 1: 6 sc in MR
Rnd 2: 6 inc (12sc)
Crochet the third and all subsequent rows behind the back wall of the loop.
Rnd 3: (1sc, inc)*6 (18sc)
Rnd 4: 1sc, inc, (2sc, inc)*5, 1 sc (24sc)
Rnd 5: (3sc, inc)*6 (30sc)
Rnd 6: 2sc, inc, (4sc, inc)*5, 2sc (36sc)
Rnd 7: (5sc, inc)*6 (42sc)
Rnd 8-9: 42sc (2 rows)
Do not cut the thread, but continue crocheting.
Fold the two parts of the shell wrong side inward and connect, crocheting 42 sc. When there is a small hole left, put it inside filler, do not stuff too tightly. Continue crocheting and close hole to the end, do not cut the thread.
Dial a chain of 20 ch, count 10 sc on the shell and in the 11th sc attach the chain with a connecting post. Fasten the thread and cut off. From the first stitch (where they began to crochet a chain from ch) count 8sc and attach a new thread to this loop. Tie and attach the second strap in the same way.
Try on the shell on the back, it should hold well (if the shell dangles or, conversely, is difficult to put on, change the number of ch in straps).
Hide all the ends of the threads inside.
Hat
Rnd 1: 6 sc in MR
Rnd 2: 6 inc (12sc)
Rnd 3: (1sc, inc)*6 (18sc)
Rnd 4: 1sc, inc, (2sc, inc)*5, 1 sc (24sc)
Rnd 5: (3sc, inc)*6 (30sc)
Rnd 6: 2sc, inc, (4sc, inc)*5, 2sc (36sc)
Rnd 7: (5sc, inc)*6 (42sc)
Rnd 8: BLO 42sc
Rnd 9: 42sc
Rnd 10: 3sc, inc, (6sc, inc)*5, 3sc (48sc)
Rnd 11: 48sc
Rnd 12: (7sc, inc)*6 (54sc)
Rnd 13: 54sc
Rnd 14: FLO (2sc, inc)*18 (72sc)
Rnd 15: 72sc
Rnd 16: (11sc, inc)*6 (78sc)
Rnd 17: 6sc, inc, (12sc, inc)*5, 6sc (84sc)
Rnd 18-19: 84sc (2 rows)
Fasten the thread, cut off, hide the tip of the thread.
For ties from the inside of hat to the back half loops of the 13th row sew (or tie) satin ribbons.
Congratulations!
More Amigurumi Turtle İdeas: