Necessary materials:
1. Hook 4.25 mm
2. Yarn of suitable thickness in black, purple, orange, brown and yellow
3. Needle
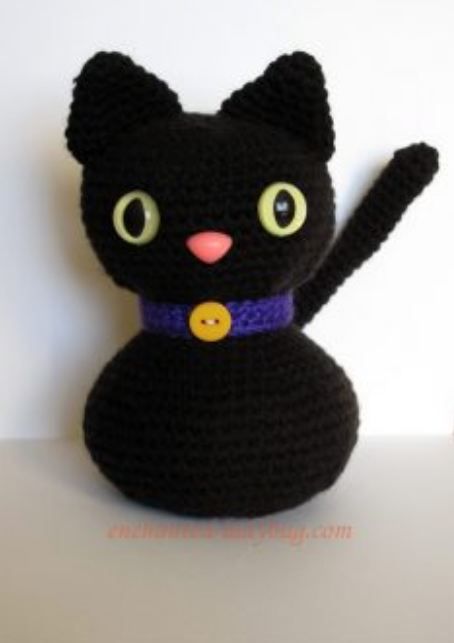
4. Eyes 18 mm with secure fastening (on the thread) yellow cat
5. Plastic nose 15 mm pink
6. Yellow button
7. Filler
Abbreviations:
• VP – air loop
• SS – connecting post
• pr – increase
• kill – decrease
• R – row
HEAD and BODY: (knit in one piece)
Black yarn
Making an amigurumi ring (KA)
R 1: 10 sc in spacecraft
R 2: pr x 10 times (20 sbn)
R 3: [sc, pr] x repeat to the end of the row (30 sc)
R 4: [2 sc, pr] x repeat to the end of the row ( 40 sc)
R 5: [3 sc, pr] x repeat to the end of the row (50 sc)
R 6-16: 50 sc (50 sc)
R 17: [3 sc, dec] x repeat to the end of the row (40 sc)
R 18: [2 sc, dec] x repeat to the end of the row (30 sc)
Attach the eyes between rows 10 and 11, and the nose between rows 12 and 13.
R 19: [sc, dec] x repeat to the end of the row (20 sc )
We start filling the part.
R 20: 20 sc (20 sc)
R 21: 20 sc (20 sc)
R 22: [sc, pr] x repeat to the end of the row (30 sc)
R 23: [2 sc, pr] x repeat to the end of the row (40 sc)
R 24: 40 sc (40 sc)
R 25: 40 sc (40 sc)
R 26: [3 sc, pr] x repeat to the end of the row (50 sc)
R 27: 50 sc (50 sc)
R 28: [4 sc, pr] x repeat to the end of the row (60 sc)
R 29-35: 60 sc (60 sc)
R 36: [4 sc, dec] x repeat to the end of the row (50 sc)
R 37: 50 sc (50 sc)
R 38: [3 sc, dec] x repeat to the end of the row (40 sc)
R 39: [2 sc, dec] x repeat to the end of the row (30 sc)
R 40: [sc, dec] x repeat to the end of the row (20 sc)
Fill the part.
R 41: dec x 10 times (10 sc)
R 42: dec x 5 times (5 sc)
Finish the job.
Leave the end of the thread to sew the hole tightly.
Hide the end of the thread inside.
Ears: 2 pcs. Black yarn
Making an amigurumi ring (KA)
R 1: 4 sbn in spacecraft (4 sbn)
R 2: pr x 4 times (8 sc)
R 3: 8 sc (8 sc)
R 4: [sc, pr] x repeat to the end of the row ( 12 sc)
R 5: [2 sc, pr] x repeat to the end of the row ( 16 sc)
R 6: [3sc, pr] x repeat to the end of the row (20 sc)
R 7: 20 sc (20 sc)
SS to 1st loop of 7th row.
Finish the work, leaving the end of the thread for sewing.
Sew on to the head.
TAIL: Black yarn
Making an amigurumi ring (KA)
R 1: 8 sc in spacecraft (8 sc)
R 2-25: 8 sc (8 sc)
Finish the work, leaving the end of the thread for sewing.
WITCH’S HAT:
If you change the colors of the yarn on the hat, connect the end of each row with a connecting post (CC). This will make the color transition less noticeable.
Purple yarn
Making an amigurumi ring (KA)
R 1: 6 sc in spacecraft (6 sc)
R 2: 6 sc (6 sc)
R 3: pr x 6 times (12 sbn)
R 4: 12 sc (12 sc)
R 5: [pr, sbn] x repeat to the end of the row (18 sbn)
R 6: 18 sc (18 sc)
R 7: 18 sc (18 sc)
R 8: [pr, 2 sbn] x repeat to the end of the row (24 sbn)
R 9: 24 sc (24 sc)
R 10: [pr, 3 sc] x repeat to the end of the row. Change the yarn to orange in the last sc. SS to the 1st loop of the row, VP
(30 sbn)
R 11: 2 sc in a loop, where CC was used, 4 sc; [pr, 4 sbn] x repeat to the end of the row. Connect SS. 1 VP. (36 PRS)
R 12: 1 sc in a loop, where CC and sc were used in a circle to the end of the row.
Change the color of the yarn to purple again in the last sc. SS in the 1st loop of the row. 1 VP. (36 PRS)
R 13: pr to the end of the row in a circle, SS, 1 VP (72 sbn)
R 14: 72 sc (72 sc)
Finish the work and hide the end of the thread.
COLLAR: Purple yarnWe knit 29 VP
R 1: 1 sc in the 2nd loop from the hook, sc in each loop to the end of the row. 1 VP, rotate work (28 sbn)
R 2: sc to the end of the row.
Finish the work, leaving the end of the thread for sewing. Sew a yellow button into the center of the collar. Sew the collar to the cat’s neck.
BROOM: Brown yarn
Making an amigurumi ring (KA)
R 1: 4 sbn in spacecraft (4 sbn)
R 2-20: 4 sc (4 sc)
Finish work, hide the end of the thread.
Cut the yellow yarn into a length of about 15 cm.
We cut the amount depending on how fluffy you want the broom to be.
Now, using a needle, thread the yellow threads through the bottom of the broomstick (our brown part).
When the “tassel” of the broom is the thickness you need, take a piece of brown yarn and tie it around the yellow one (see photo). Cut the ends of the yellow yarn to the desired length, straightening them out.


