Supplies:
Worsted weight yarn (use any brand you like) I used Red Heart Comfort
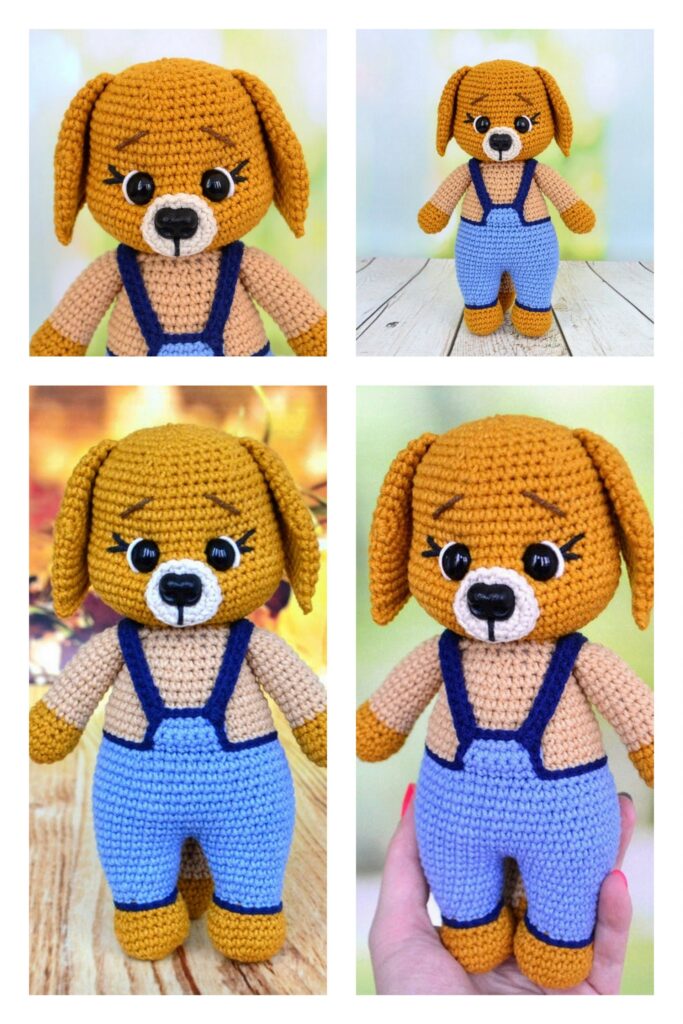
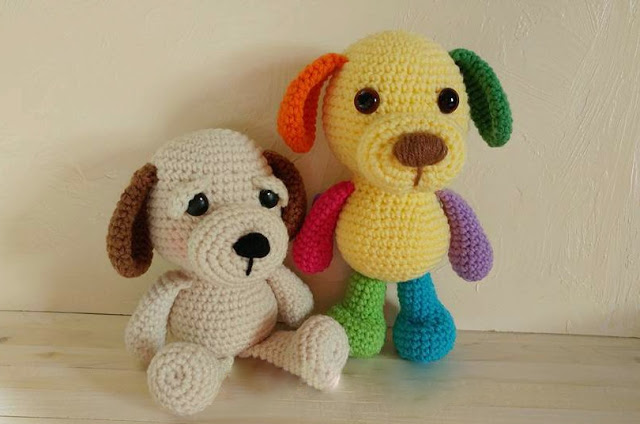
Please note: when making a multi colored amigurumi sometimes parts will come out slightly different sizes when making pairs, depending on yarn color. For example: the orange ear is larger than the green ear. I had to eliminate the last row on the orange one to make it the same length as the green one. All the other parts worked out the same but just keep that in mind.
4.25mm hook
blunt end yarn needle for sewing
scissors
Eyes: you can use buttons, felt, paint, safety eyes or crochet them. It’s up to you. For the pups pictured I used a 15mm safety eye
polyester stuffing
Abbreviations:
st = stitch
sc = single crochet
ch1 = chain one
sl st = slip stitch
2tog = crochet 2 stitches together
f/o = finish off
Magic ring:
Many parts of this amigurumi begin with a magic ring. I have 2 short video tutorials that will show you 2 different methods of making a magic ring. Use the one that is easiest for you. View 1st method here and 2nd method here.
How to read the rows:
Add a maker at the end of row 2 and move that marker each time you finish a row. Each row has a sequence. Example: 1sc then 2sc in next st means repeat that sequence 1sc then 2sc in next st followed by 1sc then 2sc in next st over and over to the end of that row. When you land on the marker you should be putting in 2sc. The number inside the parentheses ( ~ ) is the number of stitches you should have at the end of that particular row.
EYES: Placements are up to you since it’s personal preference. I put this puppy’s eyes in between the 11th and 12th row with 5 visible stitch holes between them.
Starting at the top of the head working down to bottom of body:
1) magic circle with 6sc (6)
2) 2sc in each (12)
3) 1sc then 2sc in next st (18)
4) 1sc in next 2st then 2sc in next st (24)
5) 1sc in next 3st then 2sc in next st (30)
6) 1sc in next 4st then 2sc in next st (36)
7-10) 1sc in each st for 4 rows
11) 1sc in next 5st then 2sc in next st (42)
12-16) 1sc in each st for 5 rows
Now is the time to put in the safety eyes if you’re using them.
17)1sc in next 5st then 2tog (36)
If you start to see gaps while you decrease then try the inv dec
18) 1sc in next 4st then 2tog (30)
19) 1sc in next 3st then 2tog (24)
20) 1sc in next 2st then 2tog (18)
21) 1sc in next 2st then 2sc in next st (24)
Stuff majority of head. Push the stuffing to the top of the head then make sure to get stuffing all around the sides of the face and neck area. Shape as you stuff. It will take lots of stuffing. You will stuff more in a few more rows.
22-24) 1sc in each st for 3 rows
25) 1sc in next 3st then 2sc in next st (30)
26) 1sc in next 4st then 2sc in next st (36)
27) 1sc in next 5st then 2sc in next st (42)
28-31) 1sc in each st for 4 rows
32) 1sc in next 5st then 2tog (36)
33) 1sc in next 4st then 2tog (30)
34) 1sc in next 3st then 2tog (24)
35) 1sc in next 2st then 2tog (18)
Stuff the body.. make sure to fill in any gaps in the neck area. Also be sure to get all around the bottom of the belly. The belly should be nice and fat.
36) 1sc then 2tog (12)
37) 1sc in next 2st then 2tog (9)
f/o leaving a tail for closing up the gap. Weave in and out of the remaining stitches. Add more stuffing as needed then pull yarn tail tight to close gap. Knot off and hide yarn tail in the body.
Muzzle:
1) magic circle with 6sc (6) No need to pull the center hole too tight as you will go through this hole when you whip stitch the nose in.
2) 2sc in each st around (12)
3) 1sc then 2sc in the next st (18)
4) 1sc in next 2st then 2sc in next st (24)
5) 1sc in next 2st, then 2sc in next 2st, 1sc in next 10st then 2sc in next 2st, 1sc in next 8st (28)
6-7) 1sc in each st for 2 rows
8) 1sc in next 5st then 2tog (24)
9) 1sc in next 2st then 2tog (18)
10) 1sc in each st for 1 row
sl st next st and f/o leaving a long tail for sewing.
How to stitch the nose in is on the assembly page.
Ears:
1) magic circle with 6sc (6)
2) 2sc in each st (12)
3) 1sc then 2sc in the next st (18)
4) 1sc in each st for 1 row
5) 1sc in next 5st then 2sc in next st (21)
6) 1sc in each st for 1 row
7) 1sc in next 5st then 2tog (18)
8) 1sc in each st for 1 row
9) 1sc in next 4st then 2tog (15)
10-11) 1sc in each st for 2 rows
12) 1sc in next 3st then 2tog (12)
13-14) 1sc in each st for 2 rows
15) Do not stuff ear. fold ear flat and sc through both sides across.
f/o leaving a tail for sewing.
Arms:
1) magic circle with 6sc (6)
2) 2sc in each st (12)
3) 1sc in next 3st then 2sc in next st (15)
4-5) 1sc in each st for 2 rows
6) 1sc in next 3st then 2tog (12)
7) 1sc in next 4st then 2tog (10)
8-14) 1sc in each st for 7 rows
Stuff hand after 1 or 2 rows. Lightly stuff arm when you’re done leaving the last 2 or 3 rows unstuffed.
15) fold top of arm flat and sc through both sides across.
f/o leaving a long tail for sewing.
Legs:
1) magic circle with 6sc (6)
2) 2sc in each st (12)
3) 1sc then 2sc in next st (18)
4) 1sc in next 2st then 2sc in next st (24)
5-7) 1sc in each st for 3 rows
8) 1sc in next 2st then 2tog (18)
9) 1sc then 2tog (12)
10-15) 1sc in each st for 6 rows
Stuff foot after 2 rows. At the end of row 15, stuff more into the foot, pushing stuffing into what will be the “heel” of the foot.
If you want a puppy that sits then leave the last 3 rows of the legs unstuffed and then continue onto row 16. If you want a puppy that is in a permanent standing position, then stuff the entire leg and f/o now leaving a long tail for sewing.
16) Look at where your last stitch landed then look at the shape of the foot, you might have to put 1sc in a couple more stitches to get to the side of the leg. Fold leg flat and sc through both sides across, closing up the top of the leg. ch1 and turn
17) 1sc in each st across
f/o leaving a tail for sewing.
Eye lids: Optional
1) ch6 *starting tail should be long enough to sew into head.
2) starting in 2nd ch from hook, 1hdc in next st, 2dc in next 2st, 1hdc in next st, sl st last st
f/o leaving a tail for sewing
Tail:
1) magic circle with 6sc (6)
2) 1sc in each st for 1 row
3) 1sc then 2sc in next st (9)
4-10) 1sc in each st for 7 rows
*stuff as you go, leaving the last 2 or 3 rows unstuffed.
11) fold top of tail flat and sc through both sides across.
f/o leaving a tail for sewing.
Congratulations
More Amigurumi Dog Ideas:
