ABBREVIATIONS
st = stitch
sc = single crochet
slst = slip stitch
ch = chain
dc = double crochet
hdc = half double crochet
st(s) = stitch(es)
rnd(s) = round(s)
SIZE
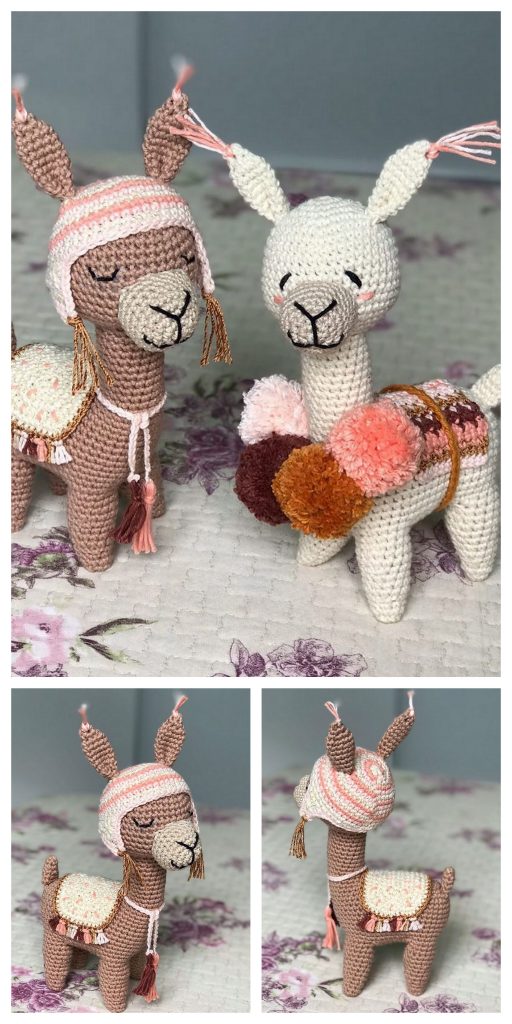
Height: approx. 55 cm, length: approx. 39 cm
MATERIALS
Schachenmayr Luxery Velvet, 100 g ball
Approx. 100 g ≈ 75 m
Col. 00020 (bunny) 3 balls
Col. 00015 (fox) 1 ball
Schachenmayr Catania, 50 g ball
Approx. 50 g ≈ 125 m
Col. 00110 (schwarz) 1 ball (nose, mouth, eyes)
Schachenmayr Catania Grande, 50 g ball
Approx. 50 g ≈ 63 m
Col. 03211 (vanille) 1 ball
Col. 03210 (apricose) 1 ball
Col. 03380 (amaranth) 1 ball
Col. 03385 (mint) 1 ball
Col. 03383 (aquarelle) 1 ball
The amount of yarn needed can vary from person to person.
stuffing
1 crochet hook 6,0 mm and 5,0 mm (halter and blancket)
1 tapestry needle (nose, mouth, eyes)
1 tapestry needle for weaving in ends
1 stitch marker
GAUGE
Single crochet (tightly crocheted):
10 st and 10 rounds = 10 x 10 cm
If your gauge differs from the given gauge, use a hook of a larger or smaller size accordingly.
NOTE: Animals should be tightly crocheted so they can be properly stuffed and shaped, and so that there are no holes
through which the stuffing can escape.
THE BASICS
Stitches: slip stitches, chain, single crochet, half double crochet, double crochet, increases and decreases
Starting off:
When using a thick chenille yarn such as Luxury Velvet, it is not possible to start with a magic ring as the yarn cannot
be drawn together. That’s why we start with 2 ch and work the next stitches in the 2nd ch from the hook.
Spiral rounds:
At the end of a rnd do not close with a sl st. The 1st st of the new rnd is worked in the 1st st of the previous rnd. This
creates a spiral shape.
For a better overview, mark the 1st st of every rnd with a stitch marker.
Increasing 1 st: Work 2 st in the same insertion point.
Decreasing 1 st: Work 2 st together.
INSTRUCTIONS
NOTES:
• Stuff before joining the pieces together. Do this gradually with a small amount of stuffing and shape the animal as you go.
• It is difficult to separate the work later on. If you do need to however, do it very slowly and do not pull to hard since the yarn could break.
• Sew the individual pieces on with a different yarn such as Catania or Bravo in a similar color as Luxury Velvet is too thick for this.
Body
Work the body from the top to the bottom:
Start with Bunny with 24 ch:
Rnd 1: Work 22 sc in the 2nd ch from hook, 3 sc in last st, continue working around the foundation chain, 21 sc, Increase 1 st = 48 sc
Rnd 2: Increase 1 st, 21 sc, increase 3 st, 21 sc, increase every 2nd st = 54 sc.
Rnd 3: Increase every 2nd st, 21 sc, increase every 2nd st, 2 sc, increase every 2nd st, 21 sc, increase every 2nd st, 2
sc = 62 sc.
Rnd 4: 1 sc, increase every 2nd st, 24 sc, increase every 2nd st, 3 sc, increase every 2nd st, 24 sc, increase every 2nd st,
2 sc = 71 sc.
Rnd 5: 2 sc, increase every 2nd st, 26 sc, increase every 2nd st, 5 sc, increase every 2nd st, 26 sc, increase every 2nd st,
3 sc = 78 sc.
Rnds 6–13: 8 rnds of the same number of st = 78 sc.
Rnd 14: 33 sc, (work 2 st together) 6 times, 33 sc = 72 sc.
Rnd 15: 31 sc, (work 2 st together) 5 times, 31 sc = 67 sc.
Rnd 16: 29 sc, (work 2 st together) 5 times, 28 sc = 62 sc.
The part with the decreases is the back of the alpaca. The beginning of the round should be at the middle of the chest.
There should be exactly 13 sc on either side of the middle of the chest, so count off a total of 26 sc and place a stitch
marker. (Picture 1).
This is the part of the neck you work across, the rest remains unworked. (Picture 2 and 3):
Rnd 17: 1 rnd in same number of st = 26 vs
Rnd 18: 12 sc, work 2 st together, 12 sc = 25 sc.
Rnd 19: 12 sc, work 2 st together, 11 sc = 24 sc.
Rnd 20: 1 rnd of the same number of st= 24 sc.
Secure the yarn with a marker, stuff the body and join the back together with other yarn, e.g. Catania/Grande. Keep
adding stuffing and bring the animal into shape.
The pick up the secured stitch on the neck.
Rnds 21 – 25: 5 rnds of the same number of st = 24 sc.
Rnd 26: Increase every 2nd st = 36 sc.
Rnd 27: Increase every 4th st = 45 sc.
Rnd 28: 1 rnd of the same number of st= 45 sc.
Rnd 29: Increase every 9th st = 50 sc.
Rnds 30 – 35: 6 rnds of the same number of st = 50 sc.
Rnd 36: Work every 9th and 10th st together = 45 sc.
Rnd 37: Work every 8th and 9th st together = 40 sc.
Rnd 38: Work every 7th and 8th st together = 35 sc.
Rnd 39: Work every 6th and 7th st together = 30 sc.
Rnd 40: Work every 5th and 6th st together = 25 vs
Rnd 41: Work every 4th and 5th st together = 20 sc.
Rnd 42: Work every 3rd and 4th st together = 15 sc.
Rnd 43: Work every 2nd and 3rd st together = 10 sc.
Rnd 44: Work every 1st and 2nd st together = 5 sc.
Finish the work with sl st, cut the thread, close the opening and draw the yarn through the head.
In all the following sections, you can cut the final thread
short and drawn it inside/draw through 2–3 st. It is not possible to sew with the chenille yarn.
Leg (x4)
Start with Fox, ch 2:
Rnd 1: 6 sc in the 2nd ch from hook = 6 sc.
Rnds 2 – 3: 2 t = 6 sc.
Rnd 4: Increase every 2nd st = 9 sc.
Rnd 5: 1 rnd of the same number of st= 9 sc.
Rnd 6: Increase every 3rd st = 12 sc.
Rnd 7: 1 rnd of the same number of st= 12 sc.
Rnd 8: Increase every 4th st = 15 sc.
Rnd 9: 1 rnd of the same number of st= 15 sc.
Rnd 10: Increase every 5th st = 18 sc.
Rnd 11: 1 rnd of the same number of st= 18 sc.
Rnd 12: Increase every 6th st = 21 sc.
Rnd 13: 1 rnd of the same number of st= 21 sc.
Change color to Bunny:
Rnd 14: Increase every 7th st only inserting the hook in the front loop = 24 sc.
Rnd 15: 1 rnd of the same number of st= 24 sc.
Rnd 16: Increase every 4th st = 30 sc.
Rnd 17: 1 rnd of the same number of st= 30 sc.
From here, work in rows:
Row 1: without ch turn over, and work the 1st and 2nd st together, 11 sc, Work 2 st together.
R 2: without ch turn over, work the 1st and 2nd st together, 9 sc, work 2 st together.
R 3: without ch turn over, work the 1st and 2nd st together, 7 sc, Work 2 st together.
Finish the work with 1 sl st, cut the yarn short and draw inside the leg.
Stuff the legs firmly.
Sew the legs onto the body using Catania so that the extra rows are always to the sides of the body while the rest of
the leg is sewn on under the body.
Do not go beyond the middle seam in the tummy.
Tail
Start with Bunny, ch 2:
Rnd 1: Work 4 sc in the 2nd ch from hook = 4 sc.
Rnd 2: Increase every 2nd st = 6 sc.
Rnd 3: Increase every 3rd st = 8 sc.
Rnd 4: Increase every 2nd st = 12 sc.
Rnd 5: 1 rnd of the same number of st= 12 sc.
Squash the tail flat and crochet the opening together with 6 sc. Finish the work with sl st, cut the yarn short and fasten
off. Sew the tail on in the middle at the top of the backside.
Ear (x2)
Start with Fox, ch 2:
Rnd 1: Work 4 sc in the 2nd ch from hook = 4 sc.
Rnd 2: Increase every 2nd st = 6 sc.
Rnd 3: Increase every 3rd st = 8 sc.
Rnd 4: Increase every 4th st = 10 sc.
Rnd 5: Increase every 5th st = 12 sc.
Rnds 6 – 8: 3 rnds of the same number of st = 12 sc.
Squash the ears flat and crochet the opening together with 6 sl st. Fold again in the middle and sew the ears onto the
top of the head.
Muzzle
Start with Fox, ch 2:
Rnd 1: 6 sc in the 2nd ch from hook, 3 sc in last st, then work on the other side ot the chain, 5 sc, 2 sc in last st = 16 sc
Rnd 2: Increase 1 st, 5 sc, increase 3 st, 5 sc, increase every 2nd st = 22 sc.
Rnds 3 – 4: 2 t sc = 22 sc.
Finish the work with 1 sl st, cut the yarn and draw inside the muzzle.
Embroider with Catania the mouth and nose.
Sew muzzle onto the head
ACCESSORIES
Halter
Work with Catania Grande and a 5 mm hook (H/8). Choose the colors as you wish:
Ch approx. 30, until the chain fits around the muzzle.
Close to a ring with 1 sl st.
Work another 70 ch and attach to opposite sides of the first circle.
Cut the thread and fasten off.
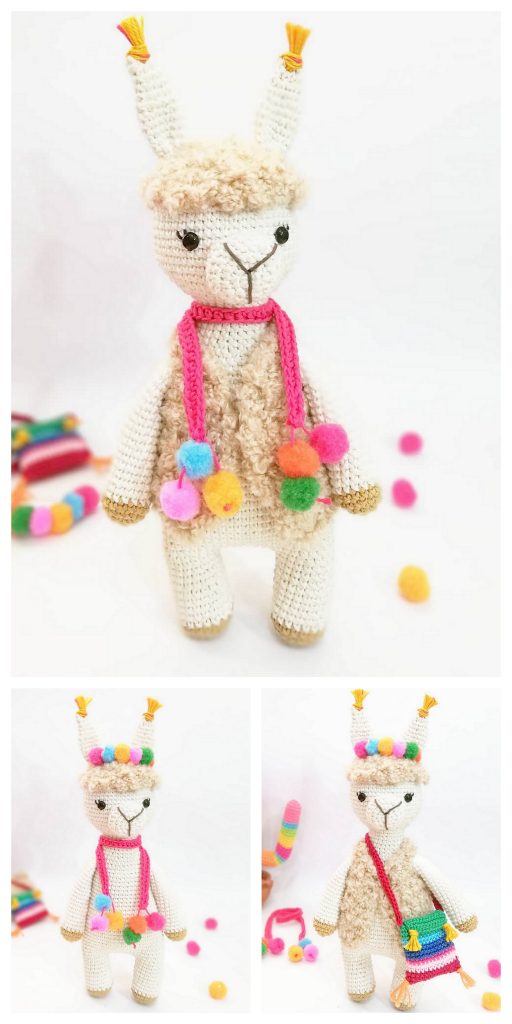
If you wish, attach a few bobbles and tassels to to the halter.
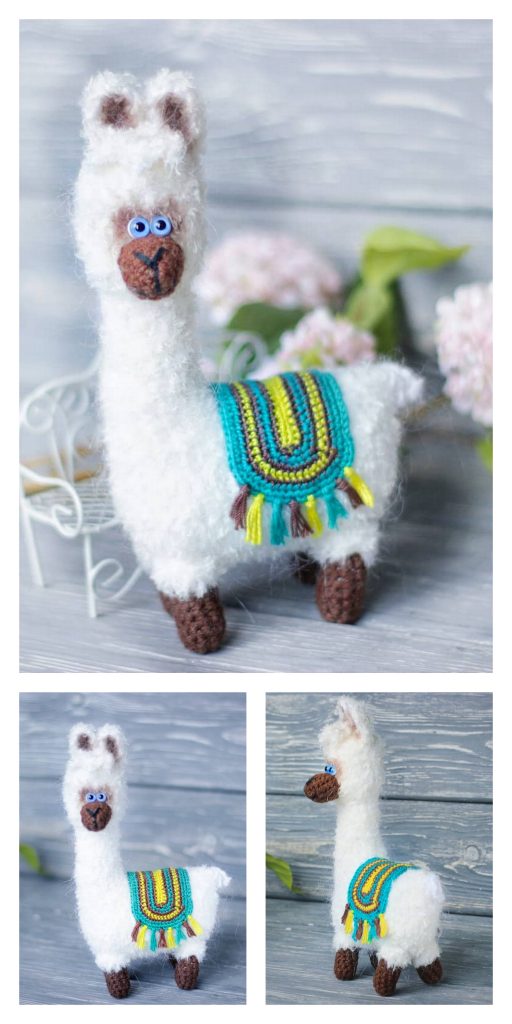
Blanket
The colors can be in any order you want.
Work the blanket in rounds from the middle out.
Start with 11 ch:
Rnd 1: Work 9 sc in the 2nd ch from hook, 3 sc in last st, then work on the other side of the chain, 8 sc, 2 sc in last st.
= 22 sc
Rnd 2: Increase 1 st, 8 sc, increase 3 st, 8 sc, increase every 2nd st.
Rnd 3: 1 sc, increase 1 st, 9 sc, increase 1 st, 3 sc, increase 1 st, 9 sc, increase 1 st, 2 sc.
Rnd 4: 1 sc, increase 1 st, 11 sc, increase 1 st, 3 sc, increase 1 st, 11 sc, increase 1 st, 2 sc.
Rnd 5: 1 sc, increase every 2nd st, 11 sc, increase every 2nd st, 3 sc, increase every 2nd st, 11 sc, increase every 2nd st,
2 sc.
Rnd 6: 3 sc, increase 1 st, 14 sc, increase 1 st, 6 sc, increase 1 st, 14 sc, increase 1 st, 3 sc.
Rnd 7: 3 sc, increase every 2nd st, 14 sc, increase every 2nd st, 6 sc, increase every 2nd st, 14 sc, increase every 2nd st,
3 sc.
Rnd 8: 5 sc, increase 1 st, 16 sc, increase 1 st, 10 sc, increase 1 st, 16 sc, increase 1 st, 5 sc.
Rnd 9: ch 2 , 5 dc, * 2 dc, ch 1, 2 dc in the same st *, 17 dc repeat from * – *, 11 dc, repeat from * – *, 17 dc, repeat from * – *, 5 dc, close with 1 sl st.
FINISHING OFF
If you wish, attach some tassels to the blanket.
To attach the blanket to the animal, work a few chain stitches on the short sides of the blanket and tie underneath
the belly.
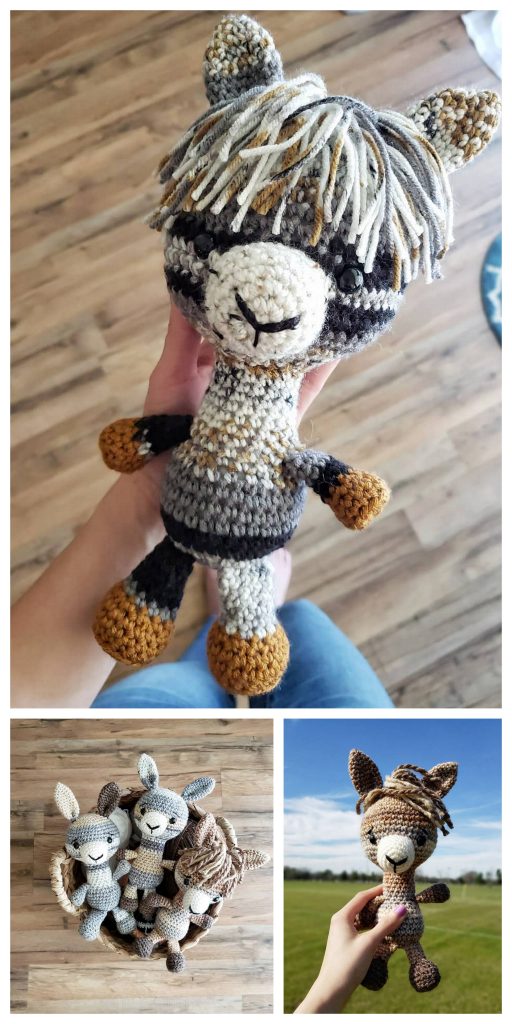
Congratulations
More Amigurumi Alpaca Ideas: