- Lion Brand Yarn’s Vanna’s Choice (100% acrylic #4 worsted weight yarn); you will need a cream yarn (head, limbs, bottom of shell), white yarn (tube around the shell) and two shades of a colour for the shell (one darker and one lighter, e.g. dark and light green, dark and light pink, dark and light blue, etc)
- 30 g Fisherman (cream)
- 23 g Fern (light green)
- 22 g White
- 2 g Kelly Green (dark green)
- Boye 2.25 mm hook
- Yarn needle
- fiberfill
- 10 mm x 8 mm oval safety eyes
- black embroidery floss (for mouth and eyelashes)
- 4 mm pink brads for cheeks
- lock ring stitch markers
Note:
- I worked in continuous rounds (vs. joined rounds) unless otherwise indicated.
- Begin pieces with the Magic Circle and use the Invisible Decrease to minimize number of holes and bumps.
- Darker colour is stitched onto shell using Surface Crochet. Learn how to Surface Crochet with Moogly’s helpful tutorial HERE!
- Choose any colours you like for the turtle shell: a lighter shade for the actual shell, and a darker shade for the surface crochet accents!
Finished Dimensions:
7” long, 5” wide, 3” tall
HEAD
With cream yarn,
Round 1: 6 sc in Magic Ring. (6 sts)
R2: Inc around. (12 sts)
R3: *Sc 1, Inc*, rep 6 times. (18 sts)
R4: *Sc 2, Inc*, rep 6 times. (24 sts)
R5: *Sc 3, Inc*, rep 6 times. (30 sts)
R6-11: Sc 30. (30 sts)
R12: *Sc 3, dec 1*, rep 6 times. (24 sts)
Place safety eyes between Rounds 10 and 11, about 5 stitches apart. Place pink brads for cheeks beside eyes, also between Rounds 10 and 11. Embroider mouth if desired. Begin stuffing head.
R13: *Sc 2, dec 1*, rep 6 times. (18 sts)
R14: *Sc 1, dec 1*, rep 6 times. (12 sts)Finish stuffing head.
R15: *Dec 1*, rep 6 times. (6 sts).
Fasten off and weave in end.
ARMS/LEGS (make 4)
With cream yarn,
Round 1: 8 sc in Magic Ring. (8 sts)
R2: *Sc 1, Inc*, rep 4 times. (12 sts)
R3-10: Sc 12. (12 sts)
Fasten off and leave long end for sewing.
TAIL
With cream yarn,
Round 1: 4 sc in Magic Ring. (4 sts)
R2: *Sc 1, Inc*, rep 2 times. (6 sts)
R3-4: Sc 6. (6 sts).
R5: *Sc 2, Inc*, rep 2 times. (8 sts)
R6: Sc 8. (8 sts)
Fasten off and leave long end for sewing. Do not stuff.
TOP SHELL
Using light green,
Round 1: 6 sc in Magic Ring. (6 sts)
R2: Inc around. (12 sts)
R3: *Sc 1, Inc*, rep 6 times. (18 sts)
R4: *Sc 2, Inc*, rep 6 times. (24 sts)
R5: *Sc 3, Inc*, rep 6 times. (30 sts)
R6: *Sc 4, Inc*, rep 6 times. (36 sts)
R7: *Sc 5, Inc*, rep 6 times. (42 sts)
R8: *Sc 6, Inc*, rep 6 times. (48 sts)
R9: *Sc 7, Inc*, rep 6 times. (54 sts)
R10: *Sc 8, Inc*, rep 6 times. (60 sts)
R11-21: Sc 60. (60 sts)
Fasten off and leave long end for sewing.
Adding Surface Crochet Detailing to Shell:
To add some detail and accents to the turtle shell, we will use a technique called surface crochet with the darker green yarn. Surface crochet is a way to add slip stitches onto the surface of a piece that gives a very clean look, and you can choose any direction you would like to crochet (it’s very free form as you could even stitch a letter or a design). You can reference surface crochet using Moogly’s very helpful tutorial HERE if you would like to see surface crochet in action. Follow the steps below:
- Insert your crochet hook into the turtle shell where you would like to begin.
- With the darker green yarn being underneath the shell, pull up a loop.
- Insert your crochet hook back into the shell in the direction that you would like to surface crochet.
- Pull up the darker green yarn from underneath the shell and continue to pull through the loop on the hook. One stitch has been surface crocheted onto the shell!
Using darker green, surface crochet circle (between Rounds 6 and 7) and six lines onto shell.
BOTTOM SHELL
Using cream yarn,
Round 1: 6 sc in Magic Ring. (6 sts)
R2: Inc around. (12 sts)
R3: *Sc 1, Inc*, rep 6 times. (18 sts)
R4: *Sc 2, Inc*, rep 6 times. (24 sts)
R5: *Sc 3, Inc*, rep 6 times. (30 sts)
R6: *Sc 4, Inc*, rep 6 times. (36 sts)
R7: *Sc 5, Inc*, rep 6 times. (42 sts)
R8: *Sc 6, Inc*, rep 6 times. (48 sts)
R9: *Sc 7, Inc*, rep 6 times. (54 sts)
R10: *Sc 8, Inc*, rep 6 times. (60 sts)
R11: Sc 60. (60 sts)
Fasten off.
WHITE TUBE
Using white yarn,
Chain 10, join with sl st to form ring (be careful not to twist the chain).
Round 1: Sc 10 around. (10 sts)
Rounds 2-68 or until desired length is achieved: Sc 10. (10 sts)
Stuff lightly as you go. Fasten off and leave long end for sewing.
FINISHING
Stuff top shell gently so that bottom shell does not puff out when they are attached together. Sew top shell onto bottom shell.Sew head onto front of shell and tail onto back of shell. Stuff arms and legs. Place arms on either side of head and sew onto shell. Place legs on either side of tail and sew onto shell.
Place white tube around shell and ontop of limbs, head and tail. Rather than whip stitching around the entire tube, you can use several points of attachment to secure the white tube onto the shell. Cut a strand of white yarn, insert it through the bottom of the turtle, through the bottom of the tube, and back down through the turtle (about one stitch away from point of first insertion) and tie several knots. For our turtle, we used FIVE points of attachment to secure the white tube into place: in the head (which tags down two spots- see further explanation below), on both sides of the shell, and towards the tail (for this point we inserted the needle through the tube first, then the shell, and then back through the tube).
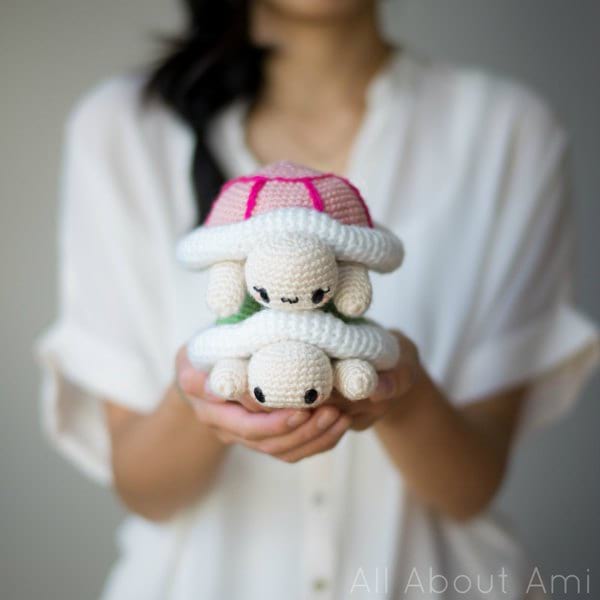
In order to make the white tube wrap around the head more snugly, tag the white tube down in two different locations through the head as shown below.Enjoy crocheting your own sweet turtles using your favourite colours!
Give them a variety of expressions and details such as eyelashes, smiles or even special letters or designs on the shell! Personalize your amigurumi to your heart’s content!

