TOOLS AND MATERIALS:
Yarn Art Jeans yarn (50% cotton, 50% acrylic) milky and yellow;
Filler (holofiber);A marker to indicate the beginning of a new row (I have a pin);
Thick needle for sewing parts;Scissors;
A piece of cotton fabric for a skirt, Elastic;
Two black plastic eye beads;
A little black floss (for nose embroidery).
LEGEND:
VP – air loop;
RLS – single crochet;
CH – double crochet;
PRIB – increase (two columns in one loop);
UB – decrease (two columns knitted together).
HEAD
We knit the head with a thread of milky color. We fill in the course of knitting.
1 row: 6 sc in amigurumi ring
2 row: 6 PRIB (12)
3 row: 1 sc, PRIB – repeat to the end of the row (18)
4 row: 2 sc, PRIB – repeat to the end of the row (24)
5-9 row : 24 sc (24)
10 row: 8 sc (1 sc, PRIB) x4 times, 8 sc (28)
11 row: 13 sc, 2 prib, 13 sc (30)
12 row: 4 sc, PRIB – repeat to the end rows (36)
13 row: 5 sc, PRIB – repeat to the end of row (42)
14 row: 42 sc (42)
15 row: 6 sc, PRIB – repeat to the end of row (48)
16-20 row: 48 sc ( 48)
21 row: 6 PRS, UB – repeat to the end of the row (42)
22 row: 5 PRS, UB – repeat to the end of the row (36)
23 row: 4 PRS, UB – repeat to the end of the row (30)
24 row: 3 PRS, UB – repeat to the end of the row (24)
25 row: 2 PRS, UB – repeat to the end of the row (18)
26 row: 1 PRS , UB – repeat to the end of row (12)
27 row: decrease until the hole is closed.
EARS (x2)
1 row: 6 sc in amigurumi ring
2 row: 1 sc, PRIB – repeat to the end of the row (9) 3 row: 9 sc (9)
4 row: 2 sc, PRIB – repeat to the end of the row (12) 5 row: 3 PRS, PRIB – repeat to the end of the row (15) 6 row: 4 PRS, PRIB – repeat to the end of the row (18) 7 row: 5 PRS, PRIB – repeat to the end of the row (21) 8 row: 21 sc (21)
9 row: 6 sc, PRIB – repeat to the end of the row (24) 10-14 row: 24 PRS (24)
15 row: 6 PRS, UB – repeat to the end of the row (21) 16 row: 5 PRS, UB – repeat to the end of the row (18) Fold the edges together, knit 8 sc. You don’t need to stuff your ears.
TRUNK
We begin to knit with a milk-colored thread. We fill in the course of knitting.1 row: 6 sc in amigurumi ring
2 row: 6 PRIB (12)
3 row: 1 sc, PRIB – repeat to the end of the row (18) 4 row: 2 sc, PRIB – repeat to the end of the row (24) 5 row: 3 RLS, PRIB – repeat to the end of the row (30) 6 row: 4 RLS, PRIB – repeat to the end of the row (36) 7 row: 5 RLS, PRIB – repeat to the end of the row (42) 8-12 row: 42 RLS
Change the color of the thread to yellow.
13 row: 42 RLS
Change the color of the thread to milk, and so we will alternate the colors of each row.
14 row: 42 PRS
15 row: 5 PRS, UB – repeat to the end of the row (36) 16-18 row: 36 PRS 19 row: 4 PRS, UB – repeat to the end of the row (30)
20-22 row: 30 PRS23 row: 3 PRS, UB – repeat to the end of the row (24) 24-26 row: 24 PRS. Cut off the thread, leaving a long end for sewing.
FRONT FEET (x2)
Knit with a milky thread. We fill in the course of knitting.
1 row: 6 sc in amigurumi ring
2 row: 6 PRIB (12)
3 row: 1 sc, PRIB – repeat to the end of the row (18)
4-6 row: 18 sc
7 row: 6 sc, 3 dec, 6 sc ( 15)
8 row: 7 PRS, 1 UB, 6 PRS (14)
9-18 row: 14 RLS
19 row: (1 RLS, UB) x 4 times, 2 RLS
20 row: Decreases until the hole is closed.Cut off the thread, leaving a long end for sewing. Thus, we knit two parts.
Hind feet (x2)
Knitting yarn milky. We fill in the course of knitting.
1 row: 6 sc in amigurumi ring
2 row: 6 PRIB (12)
3 row: 1 sc, PRIB- repeat to the end of the row (18)
4-6 row: 18 sc
7 row: 6 sc, 3 dec, 6 sc ( 15)
8 row: 7 sc, 1 dec, 6 sc (14)
9-21 row: 14 sc
22 row: (1 sc, dec) x 4 times, 2 sc
23 row: decrease until the hole is closed. Cut off the thread, leaving a long end for sewing. Thus, we knit two parts.
TAIL
We knit with a milk-colored thread. We fill in the course of knitting.
1 row: 6 sc in amigurumi ring
2 row: 1 sc, PRIB – repeat to the end of row (9) 3-18 row: 9 sc
Cut off the thread, leaving a long end for sewing.
Assembling and decorating toys
Sew the head to the body.
Sew on the ears:
Sew on the hind legs:
Sew on the front legs:
Sew on the tail:
Let’s start designing the face:We embroider a nose and freckles with a black floss.
We embroider marigolds on the paws:
We knit a bow with a yellow thread .
In the amigurumi ring: 4 VP of lifting, 5 columns with two crochets, 4 VP, connecting column, 4 VP, 5 columns with two crochets, 4 VP, connecting column. Sew to the head.
We take a strip of fabric of the desired length for the skirt . We fold the bottom, process it on a sewing machine. We fold and stitch the top so that you can insert an elastic band. Using a pin, insert the elastic and sew the edges together.
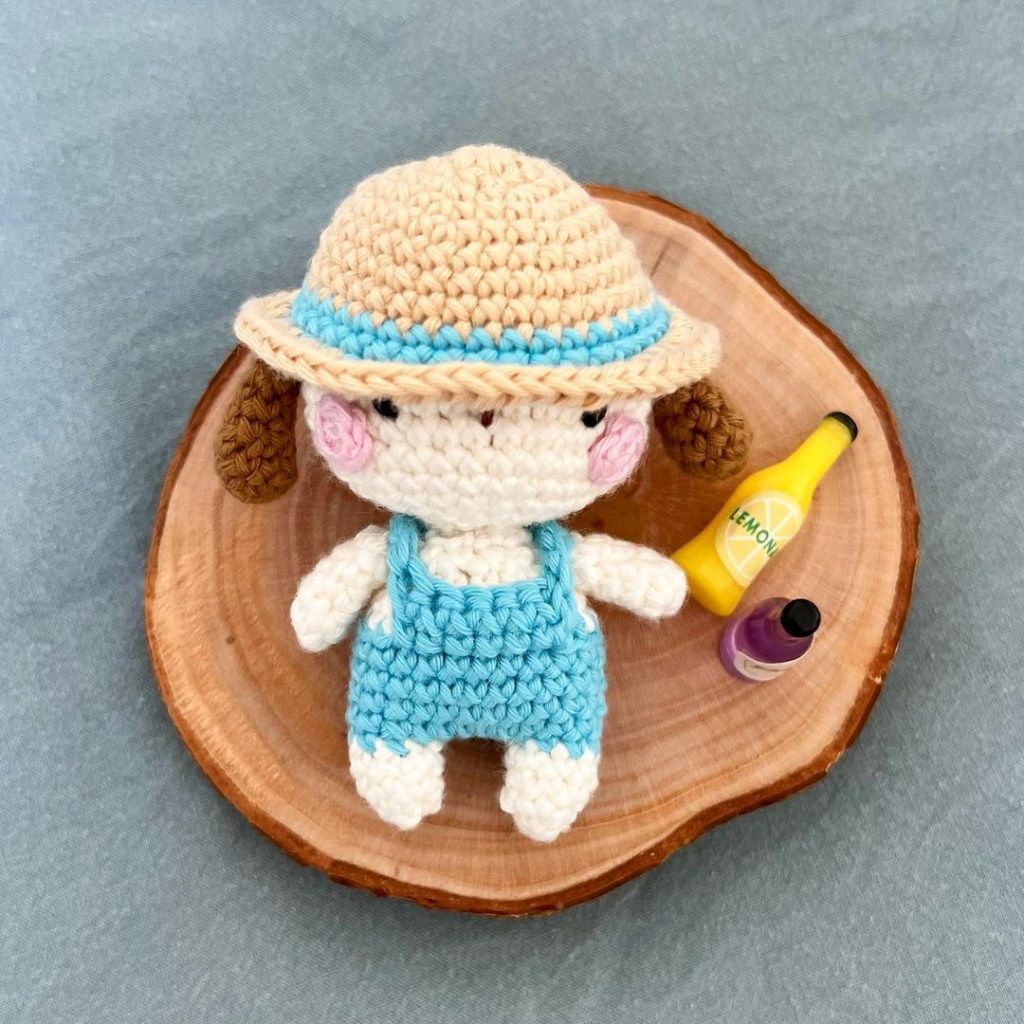
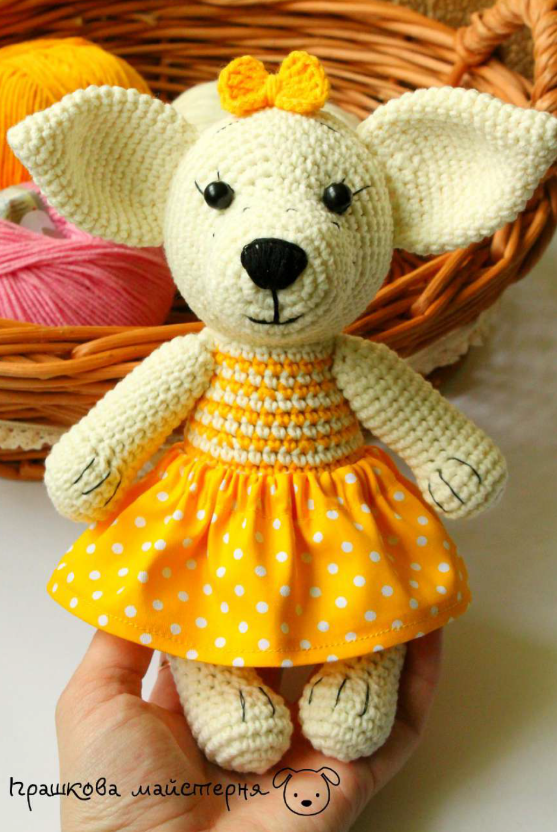
Our dog is ready!
More Amigurumi Dog İdeas: