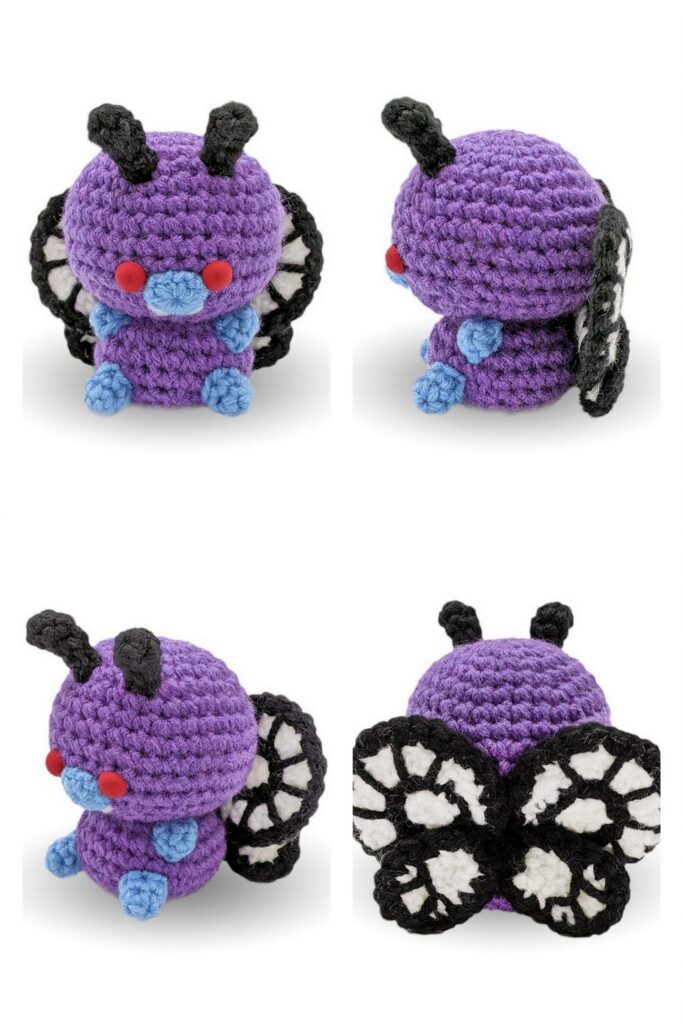
Materials & Tools
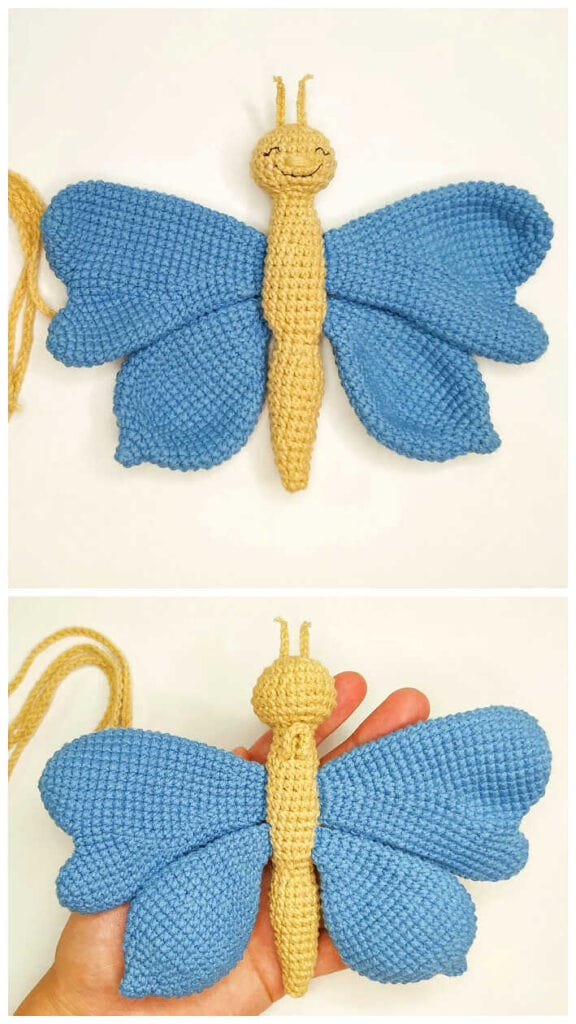
The finished project will measure 11cm tall by 15cm across from wing tip to
wing tip.
● 2mm and 1mm hook
● Sport weight yarn in purple, blue, red, black and white – I used less
than a 125m/50g ball of each color
● White embroidery thread for the eye highlights
● Craft glue if you prefer to glue the eyes and mouth to the body
● Stuffing material
● Stitch marker
I used Schachenmayr Catania sport yarn size 2 in the following colors
50g / 1.75 oz (125m / 137yds)
Stitches & Abbreviations
Ch – Chain
Sc – Single crochet
INC – Single crochet increase
DEC – Single crochet decrease
HDc – Half double crochet
HDcINC – Half double crochet increase
Dc – Double crochet
DcINC – Double crochet increase
Tc – Triple crochet
TcINC – Triple crochet increase
Slst – Slip stitch
MR – Magic ring
FLO – Forward loops only
Body (Make 1)
Rnd 1 6 MR (6)
Rnd 2 6 INC (12)
Rnd 3 (1 Sc, 1 INC) x 6 (18)
Rnd 4 (1 Sc, 1 INC, 1 Sc) x 6 (24)
Rnd 5 (3 Sc, 1 INC) x 6 (30)
Rnd 6 (2 Sc, 1 INC, 2 Sc) x 6 (36)
Rnd 7-11 36 Sc (5 rounds) (36)
Rnd 12 (2 Sc, 1 DEC, 2 Sc) x 6 (30)
Rnd 13 (3 Sc, 1 DEC) x 6 (24)
Rnd 14 (1 Sc, 1 DEC, 1 Sc) x 6 (18)
Rnd 15 FLO (5 Sc, 1 INC) x 3 (21)
Rnd 16-17 21 Sc (2 rounds) (21)
Begin to add stuffing to body, adding more material as you go.
Rnd 18 (3 Sc, 1 INC, 3 Sc) x 3 (24)
Rnd 19 24 Sc (24)
Rnd 20 (3 Sc, 1 INC) x 6 (30)
Rnd 21 (3 Sc, 1 DEC) x 6 (24)
Rnd 22 (1 Sc, 1 DEC, 1 Sc) x 6 (18)
Rnd 23 (1 Sc, 1 DEC) x 6 (12)
Rnd 24 6 DEC (6)
Cut yarn and fasten off invisibly.
Feet (Make 2)
Rnd 1 5 MR (5)
Rnd 2 1 INC, 2 Sc, 1 INC, 1 Sc (7)
Rnd 3 1 INC, 3 Sc, 1 INC, 2 Sc (9)
Rnd 4 1 INC, 8 Sc (10)
Rnd 5-9 10 Sc (5 rounds) (10)
Rnd 10 5 DEC (5)
Cut yarn and fasten off. Leave a long tail for sewing.
Hands (Make 2)
Rnd 1 5 HDc, 1 Slst in MR (5)
Cut yarn and fasten off. Leave a long tail for
sewing.
Eyes ( Make 2)
Rnd 1 6 MR (6)
Rnd 2 6 INC (12)
Cut yarn and fasten off. Leave a long tail for
sewing.
Eye Highlights (Make 2)
Using white embroidery thread and a 1mm hook,
Rnd 1 6 MR (6)
Cut yarn and fasten off invisibly.
Mouth (Make 1)
Working on both sides of the chain,
Rnd 1 ch 4, starting in the 2nd chain (8) from the hook, 2 Sc, 3 Sc in the last stitch, 1 Sc, 2 Sc into the first stitch
Rnd 2 1 INC, 1 Sc, 3 INC, 1 Sc, 2 INC (14)
Cut yarn and fasten off. Leave a long tail for sewing.
Antenna (Make 2)
Row 1 Ch 14, starting in the 2nd chain (13)
from the hook, 1 Sc, 2 HDc, 1 Sc, 9 Slst
Cut yarn and fasten off. Leave a long tail for sewing.
Lower Wing Parts (Make 4)
The lower wings are created by crocheting two lower wing parts together to
form a finished wing.
Row 1 Ch 11, starting in the 2nd chain from the hook, (25)
1 Sc, 1 HDc, 6 Dc, 1 DcINC, 5 Dc in last stitch,
1 DcINC, 6 Dc, 1 HDc, 1 Sc, ch 1, turn
Row 2 1 Sc, 1 HDc, 6 Dc, 9 DcINC, 6 Dc, 1 HDc, 1 Sc (34)
Cut yarn and fasten off invisibly.
The next row will attach two lower wing parts together to make one lower wing. Place one lower wing part on another lower wing part with the wrong sides facing each other. Change to black yarn and attach yarn to one end of the two lower wing parts. Working into both wing parts, single crochet around in each stitch.
Row 3 34 Sc (34)
Cut yarn and fasten off invisibly. You should have two lower wings when you are finished.
Upper Wings
Like the lower wings, the upper wings are created by crocheting two parts
together to form a finished wing.
Upper Wing Part 1 (Make 2)
Row 1 ch 15, working in the 4th chain from the hook, (12)
9 Dc, 2 HDc, 1 Sc, ch 1, turn
Row 2 1 Sc, 2 HDc, 8 Dc, 1 DcINC, Ch 3, turn (13)
Row 3 1 DcINC, 9 Dc, 2 HDc, 1 Sc, ch 1, turn (14)
Row 4 1 Sc, 2 HDc, 10 Dc, 1 DcINC, ch 3, turn (15)
Row 5 1 DcINC, 11 Dc, 2 HDc, 1 Sc, ch 1, turn (16)
Row 6 1 Sc, 2 HDc, 6 Dc, 6 Tc, 1 TcINC, ch 4, turn (17)
Row 7 1 TcINC, 7 Tc, 6 Dc, 2 HDc, 1 Sc, ch 1, turn (18)
Row 8 4 Sc, 2 HDc, 3 Dc, 7 Tc, 1 TcINC, 3 Tc in (21)
same stitch
Cut yarn and fasten off invisibly.
Upper Wing Part 2 (Make 2)
Row 1 ch 13, working in the 4th chain from the hook, (12)
1 Sc, 2 HDc, 9 Dc, ch 3, turn
Row 2 1 DcINC, 8 Dc, 2 HDc, 1 Sc, ch 1, turn (13)
Row 3 1 Sc, 2 HDc, 9 Dc, 1 DcINC, ch3, turn (14)
Row 4 1 DcINC, 10 Dc, 2 HDc, 1 Sc, ch 1, turn (15)
Row 5 1 Sc, 2 HDc, 11 Dc, 1 DcINC, ch 4, turn (16)
Row 6 1 TcINC, 6 Tc, 6 Dc, 2 HDc, 1 Sc, ch 1, turn (17)
Row 7 1 Sc, 2 HDc, 6 Dc, 7 Tc, 1 TcINC, ch 4, turn (18)
Row 8 3 Tc in same stitch, 1 TcINC, 7 Tc, 3 Dc, 2 HDc, (21) 4 Sc
Cut yarn and fasten off invisibly.
The next row will connect the upper wing parts together to make the upper wings. Place one upper wing part 1 on one upper wing part 2.
Continue to crochet with white yarn. Attach yarn starting at the bottom of side 1. Mark the first stitch of round 9.
Working into both wing parts,
Rnd 9 8 Sc on side 1, 21 Sc on side 2, (66)
25 Sc on side 3, 12 Sc on side 4.
Cut yarn and fasten off invisibly. Change to black yarn and attach yarn to the marked first stitch of round 9. Mark the 2nd stitch of round 10.
Rnd 10 66 Sc (66)
Cut yarn and fasten off invisibly. You should have two upper wings when you are finished.
Join the two upper wings by laying both upper wings on top of one another. Attach black yarn to the marked 2nd
stitch of round 10. Working in both wings, crochet 8 stitches along side 1. Cut yarn and fasten off. Leave a long
tail for sewing.
Assembly
Attach the eyes and mouth to the body by sewing or gluing pieces to the head.
Place the eyes about 4 stitches apart from one another above the mouth and sew or glue to the body. Glue eye highlights in the corner of each eye.
Create fangs using white thread and sewing onto the lower part of the mouth.
Position the antenna on the top of the head using pins and sew to the body.
Attach hands to the body by sewing or gluing pieces to the abdomen about seven stitches apart.
Attach the feet to the bottom of the body. Sew feet to body using the long thread that was left attached to the feet.
Attach the wings to the body starting with the two lower wings. Sew lower wings to the back of the body. It may be helpful to use pins to position the lower wings prior to sewing.
Attach the upper wings to the center of the back of the body. Sew into the joining stitches used to connect the wings to attach the wings to the body.
Congratulations
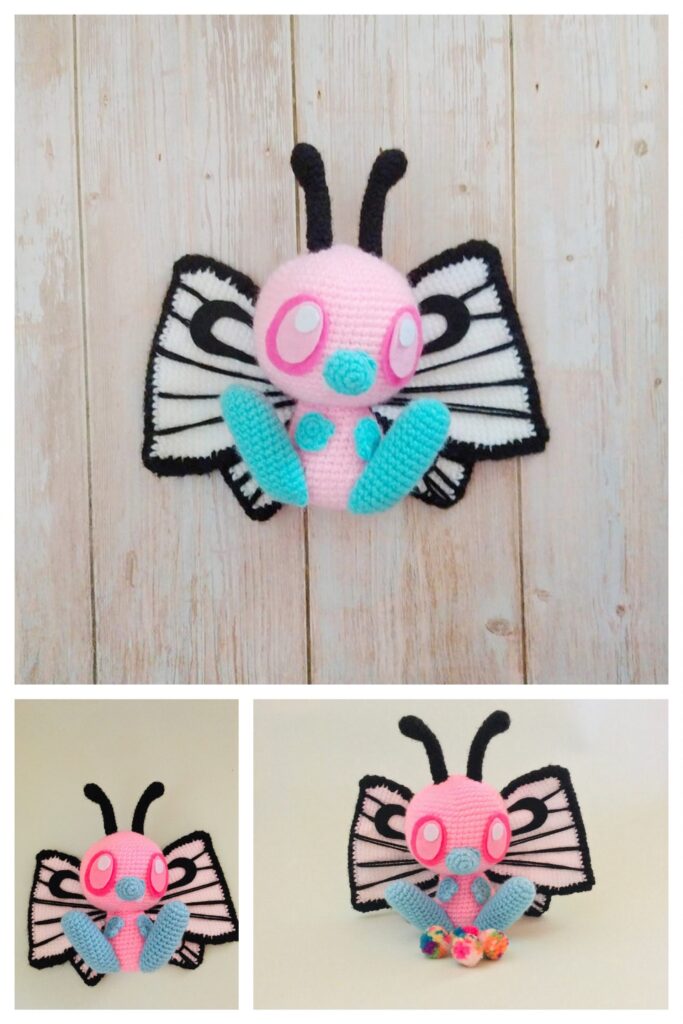
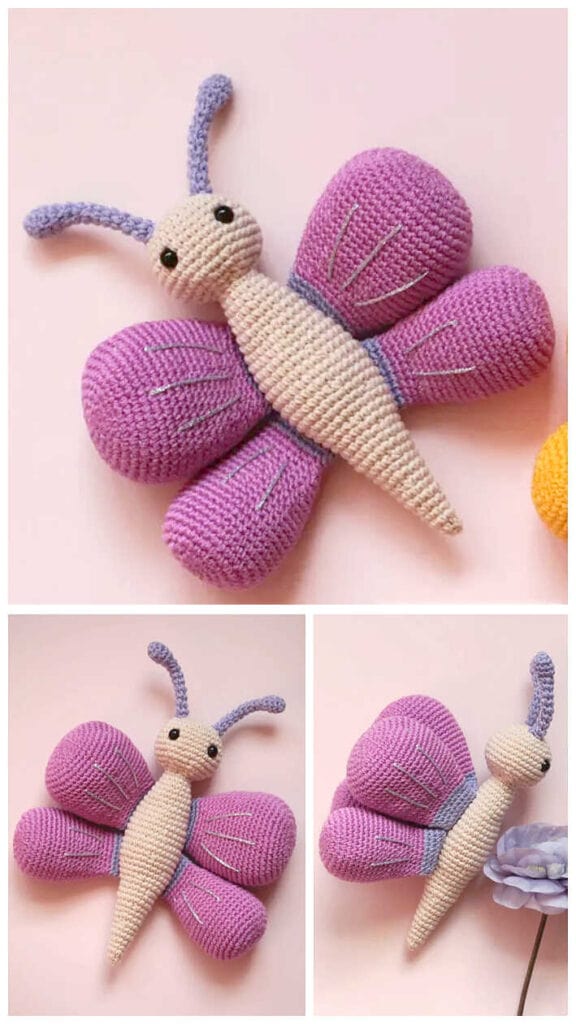
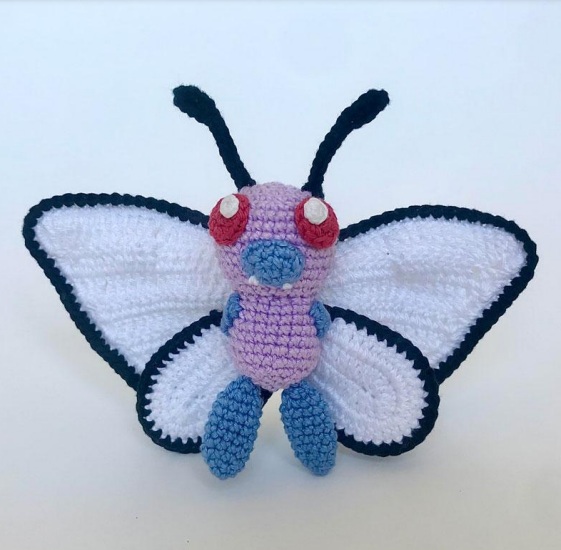
More Amigurumi Butterfly Ideas: