Materials –
Size 4 worsted weight yarn (50g of white; small amount of red, grey; white fuzzy yarn for the hat/pom, pictured is Lion Brand Boucle)
Two accent colors for the sweater, referred below as Accent A and B
3.5 mm crochet hook (these are the hooks I use and love!)
9mm safety eyes
Black crochet/embroidery thread for eyelashes/eyebrows/nose
Scissors
Tapestry needle (bent tips work great for amigurumi!)
Stuffing
Stitch markers
Abbreviations – US terminology
MC- Magic circle
SC- Single crochet
SC INC- Single crochet increase
HDC – Half double crochet
INV DEC- Invisible decrease
St(s)- Stitch(es)
NOTES –
Slowly stuff as you go, you want it to be firm but not stretched. You will be working in the round; I like to use a stitch marker at the beginning of each round.
– The body and head will be made as one piece.
– To avoid multiple ends, I recommend carrying your yarn when working between the accent colors.
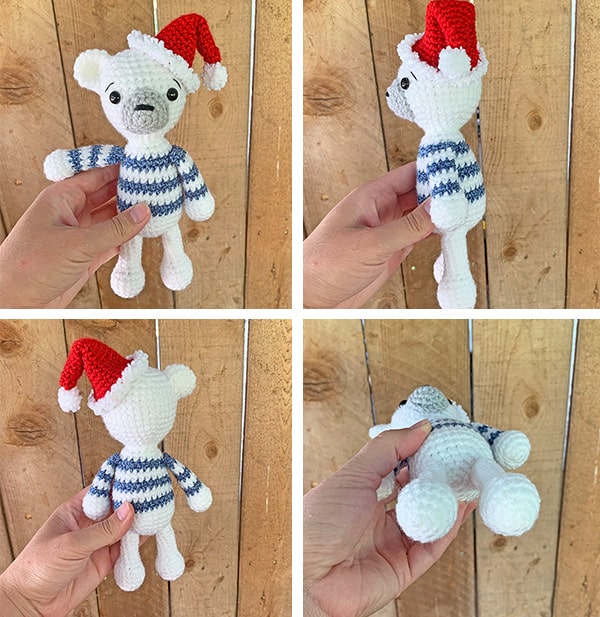
– Finished mini polar bear measures approximately 8 inches tall.
Nose –
With grey
Round 1: Create a magic circle with 6 SC
Round 2: SC INC in each st (12)
Round 3: SC in the first st, SC INC in the next, rep around (18)
Round 4: SC around (18)
Fasten off leaving a long tail for sewing. With a small piece of black crochet thread and tapestry needle, pass through 3 sts between the 2nd and 3rd rounds approximately 5 times. (Pass through more or less for a bigger/smaller nose).
Body –
With white
Round 1: Create a magic circle with 6 SC
Round 2: SC INC in each st around (12)
Round 3: SC in the first st, SC INC in the next, rep around (18)
Round 4: SC in the first 2 sts, SC INC in the next, rep around (24)
Round 5: SC in the first 3 sts, SC INC in the next, rep around (30)
Round 6: SC in the first 4 sts, SC INC in the next, rep around (36)
Round 7: SC in the first 5 sts, SC INC in the next, rep around (42)
Rounds 8-9: SC around (42)
Change to Accent A
Round 10: SC around (42)
Round 11: SC in the first 5 sts, INV DEC in the next, rep around (36)
Change to Accent B
Rounds 12-13: SC around (36)
Change to Accent A
Round 14: SC around (36)
Round 15: SC in the first 4 sts, INV DEC in the next, rep around (30)
Change to Accent B
Rounds 16-17: SC around (30)
Change to Accent A
Round 18: SC around (30)
Round 19: SC in the first 3 sts, INV DEC in the next, rep around (24)
Change to white
Round 20: SC around (24)
Round 21: SC in the first 2 sts, INV DEC in the next, rep around (18)
Round 22: SC in the first st, INV DEC in the next, rep around (12)
*We will now start the head*
Round 23: SC in the first st, SC INC in the next, rep around (18)
Round 24: SC in the first 2 sts, SC INC in the next, rep around (24)
Round 25: SC in the first 3 sts, SC INC in the next, rep around (30)
Round 26: SC in the first 4 sts, SC INC in the next, rep around (36)
Round 27: SC in the first 5 sts, SC INC in the next, rep around (42)
Rounds 28-34: SC around (42)
Note: Here is where we will add the facial features before we start closing the head. Insert your safety eyes between rounds 31 and 32, 6 stitches apart.
Optional: With black crochet/embroidery thread add eyebrows or eyelashes before securing the backs of your safety eyes.
Next, sew your nose piece centered between the eyes adding a small amount of stuffing as you go.
Round 35: SC in the first 5 sts, INV DEC in the next, rep around (36)
Round 36: SC in the first 4 sts, INV DEC in the next, rep around (30)
Round 37: SC in the first 3 sts, INV DEC in the next, rep around (24)
*Continue to stuff the head firmly
Round 38: SC in the first 2 sts, INV DEC in the next, rep around (18)
Round 39: SC in the first st, INV DEC in the next, rep around (12)
Round 40: INV DEC around (6)
Fasten off and sew remaining part closed, weave in your end.
Ear- Make 1
With white
Round 1: Create a magic circle with 6 SC
Round 2: SC INC in each st around (12)
Round 3: SC in the first 3 sts, SC INC in the next, rep around (15)
Rounds 4-5: SC around (15)
Fasten off leaving a long tail for sewing.
Arms – Make 2
With white and lightly stuffing the bottom of the arms. To avoid multiple ends, I recommend carrying your yarn while changing colors.
Round 1: Create a magic circle with 6 SC
Round 2: SC INC in each st around (12)
Round 3: SC in the first 3 sts, SC INC in the next, rep around (15)
Rounds 4-5: SC around (15)
Round 6: SC in the first st, INV DEC, rep around (10)
Change to Accent A
Rounds 7-8: SC around (10)
Change to Accent B
Rounds 9-10: SC around (10)
Change to Accent A
Rounds 11-12: SC around (10)
Change to Accent B
Rounds 13-14: SC around (10)
Change to Accent A
Rounds 15-16: SC around (10)
Fasten off leaving a long tail for sewing.
Legs – Make 2
With white stuffing lightly as you go
Round 1: Create a magic circle with 6 SC
Round 2: SC INC in each st (12)
Round 3: SC in the first st, SC INC in the next, rep around (18)
Rounds 4-6: SC around (18)
Round 7: SC in the first st, INV DEC in the next, rep around (12)
Round 8: SC in the first 2 sts, INV DEC in the next, rep around (9)
Rounds 9-15: SC around (9)
Fasten off leaving a long tail for sewing.
Hat –
With red
Round 1: Create a magic circle with 6 SC
Round 2-3: SC around (6)
Round 4: SC in the first st, SC INC in the next, rep around (9)
Rounds 5-6: SC around (9)
Round 7: SC in the first 2 sts, SC INC in the next, rep around (12)
Rounds 8-9: SC around (12)
Round 10: SC in the first 3 sts, SC INC in the next, rep around (15)
Round 11: SC around (15)
Round 12: SC in the first 4 sts, SC INC in the next, rep around (18)
Round 13: SC around (18)
Round 14: SC in the first 5 sts, SC INC in the next, rep around (21)
Round 15: SC around (21)
Round 16: SC in the first 6 sts, SC INC in the next, rep around (24)
Round 17: SC in the first 7 sts, SC INC in the next, rep around (27)
Round 18: SC in the first 8 sts, SC INC in the next, rep around (30)
Round 19: SC in the first 4 sts, SC INC in the next, rep around (36)
Change to white fuzzy yarn
Round 20: SC in the first 5 sts, SC INC in the next, rep around (42)
Fasten off leaving a long tail for sewing. Hat can be left in a standing position or using a scrap piece of red yarn, fold your hat tip over and sew into the crease to keep desired shape.
Pom –
With white fuzzy yarn create a magic circle with 7 HDC, pull tight and sl st to the first HDC. Fasten off leaving a long tail and sew to the tip of your hat.
Assembly –
Sew the ear onto one side of the head starting at the 4th round and ending at the 8th. On the opposite side sew your hat into place (stuffing is optional). I started the left side at the top round of the head and the right side just outside of the eye.
– Sew the arms onto the body centered with the head at round 19.
– Lastly, sew yours legs centered onto the bottom of your bear starting at round 2 and ending at round 6.
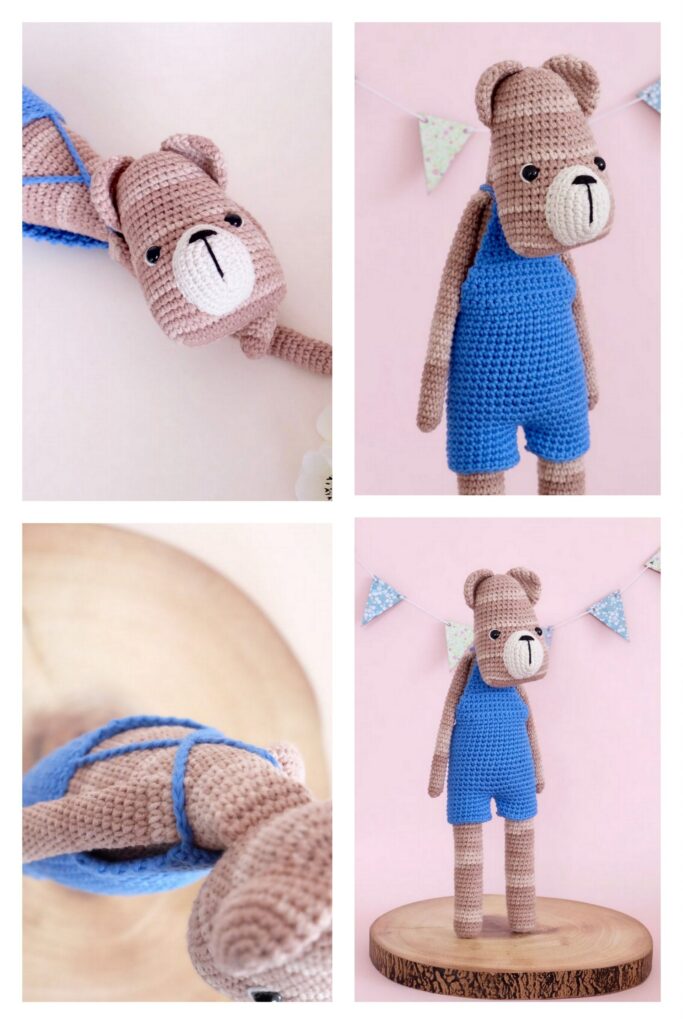
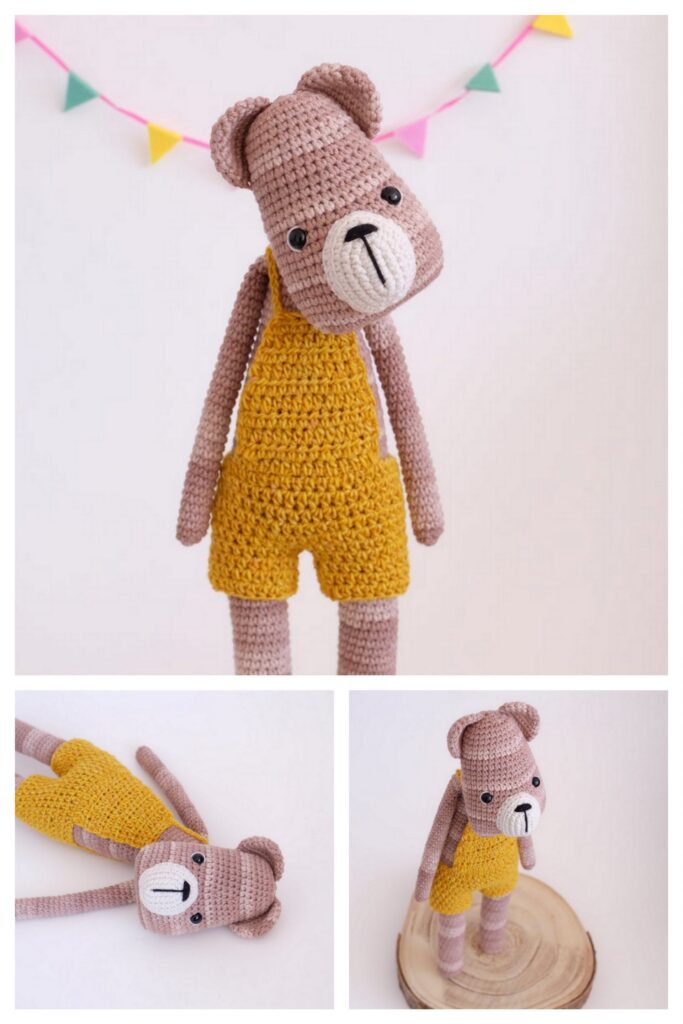
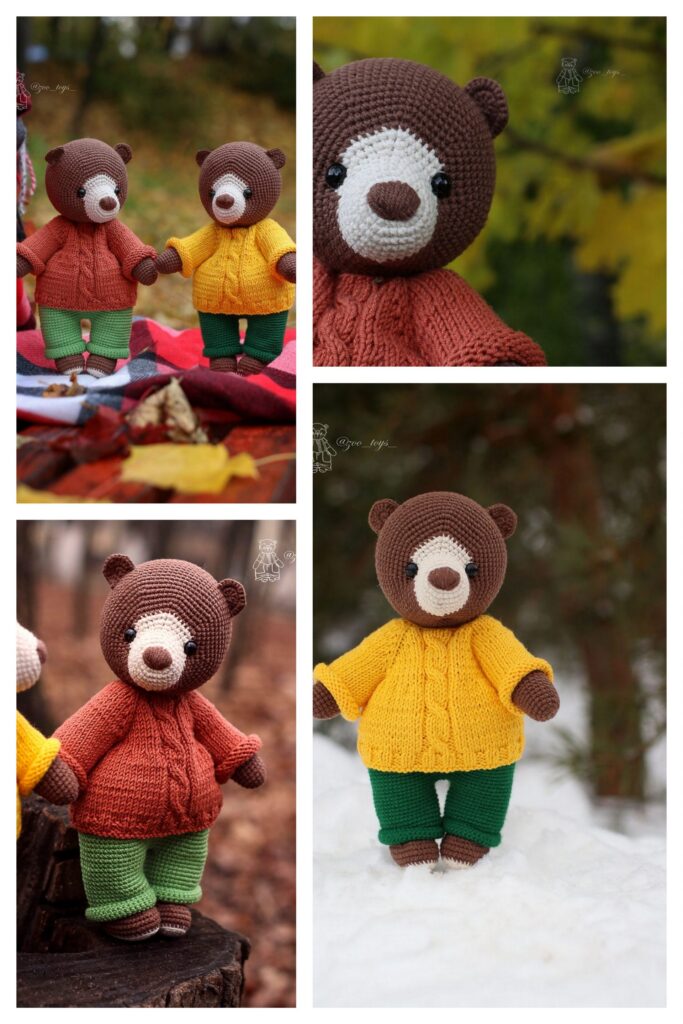
Congratulations
More Amigurumi Bear Ideas: