MATERIAL
3.5mm / US E-4 crochet hook
Yarn:
#3 / DK / light worsted yarn, 8ply, 80% cotton 20% Milk Fiber, in grey, red, white, navy blue (I use a local shop yarn, that I find quite thick for a #3, an equivalent would be Paintbox Cotton Aran but keep the 3.5mm hook to obtain tight stitches and avoid gaps where the fiberfill shows)
DMC Cotton Perle N°8 shade 310 (black) to embroider the eyebrows
Tapestry needle
Fiberfill
Stitch marker or a strand of thinner yarn
A pair of 8mm safety eyes
Ball point pins for assembly
LEVEL
Intermediate
PATTERN NOTES AND SPECIAL TECHNIQUES
The number before the abbreviation represents how many times to work one type of stitch into consecutive stitches from the previous round (unless stated otherwise). Ex: 3inc = work one increase into each of the next 3 stitches.
This pattern is worked in continuous spiral rounds (i.e. without closing the rounds with a slip stitch) unless stated otherwise. It may help to mark the first stitch of each round with a stitch marker.
For amigurumi in general, I always use an invisible decrease (unless stated otherwise) to minimize the gaps between these stitches so that the fiberfill doesn’t show too much. You can check this simple technique in a video tutorial here, but if it’s too much hassle and you prefer to start right away you can also work with normal decrease, no big deal!
I use a great, easy, invisible colour change technique with no cut and sew, check the tutorial on my blog, or just use yours and replace the sl st and chain after the colour change by a normal single crochet.
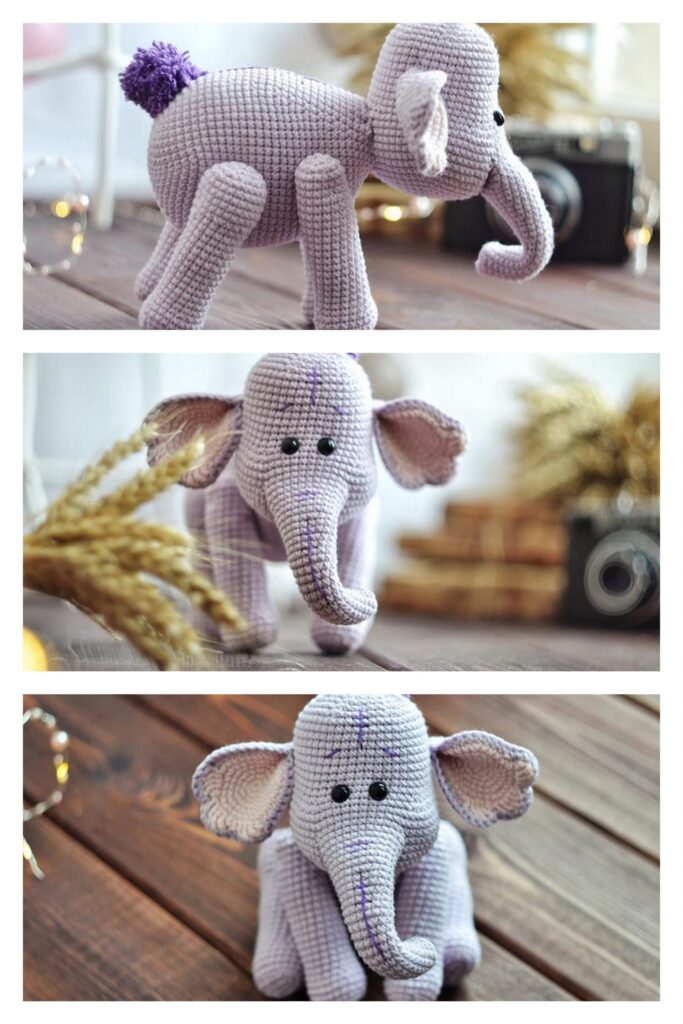
Do spend time to arrange the eyebrows, trunk and ears nicely, these details make a big difference on the final look and expression of your amigurumis!
STITCHES AND ABBREVIATIONS (US CROCHET TERMS)
st: stitch/es
sc: single crochet
hdc: half double crochet
sl st: slip stitch
inc: single crochet increase (work 2 sc into the same st)
dec: single crochet decrease (single crochet two stitches together).
[number]: total number of stitches of the round
Rnd: round
(…) x 2: repeat whatever is in between the parenthesis the number of times indicated
in BLO: in the back loop only
in FLO: in the front loop only
THE LEGS AND BODY
With grey yarn.
Rnd 1: Work 6sc into a magic ring. [6]
Rnd 2: inc in each st around. [12]
Rnd 3: in BLO, sc around. [12]
Rnd 4: (4sc, dec) x 2. [10]
Rnd 5: sc around. [10]
Rnd 6: (2sc, inc) x 3, sc in last st. [13]
Fasten off, leave a tail to close the gap between the legs later. This one is leg 1.
Make a second leg, and don’t fasten off after round 6. This one is leg 2.
Rnd 7: now let’s join the two legs together. In leg 2, 7sc. Continue in first stitch of leg 1, sc in all 13 stitches of leg 1. Continue in leg 2, 7sc (work the first sc in the stitch that already has a sc in it, not in the first available stitch). [27]
Rnd 8: sc around. [27]
Rnd 9: (3sc, inc) x 6, 2sc, inc. [34]
Use the tail of leg 1 to sew closed the small gap between the two legs.
Rnd 10: sc around. [34]
Change colour with white yarn (finish your last sc with the new colour, tutorial here).
Rnd 11: sl st (tight), chain 1 (make it loose), sc around. [34] (the sl st doesn’t count as a st).
THE HEAD
With grey yarn.
Rnd 1: Work 6sc into a magic ring. [6]
Rnd 2: inc in each st around. [12]
Rnd 3: (sc, inc) x 6. [18]
Rnd 4: (2sc, inc) x 6. [24]
Rnd 5: sc in each st around. [24]
Rnd 6: (3sc, inc) x 6. [30]
Rnd 7: sc in each st around. [30]
Rnd 8: (4sc, inc) x 6. [36]
Rnd 9: sc in each st around. [36]
Rnd 10: (5sc, inc) x 6. [42]
Rnd 11-15: sc in each st around [42]
Insert safety eyes between round 12 and 13, with 8 stitches between the 2 eyes.
Rnd 16: (5sc, dec) x 6. [36]
Rnd 17: (4sc, dec) x 6. [30]
Rnd 18: (3sc, dec) x 6. [24]
Rnd 19: (2sc, dec) x 6. [18]
Stuff firmly with fiberfill.
Rnd 20: (sc, dec) x 6. [12]
Rnd 21: 6dec. [6]
Fasten off and sew closed.
THE ARMS (make 2)
With grey yarn.
Rnd 1: Work 5sc into a magic ring. [5]
Rnd 2: inc in each st around. [10]
Rnd 3: in BLO, sc around. [10]
Rnd 4: (3sc, dec) x 2. [8]
Rnd 5: sc around. [8]
Rnd 6: 3sc, dec, 3sc. [7]
Change colour to white.
Rnd 7: sl st (tight), chain 1 (loose), 6sc. [7] (the sl st doesn’t count as a st)
Rnd 8: skip the sl st, work 1sc in the chain, 6sc. [7]
Change colour to navy blue.
Rnd 9: sl st (tight), chain 1 (loose), 6sc. [7] (the sl st doesn’t count as a st)
Rnd 10: skip the sl st, work 1sc in the chain, 6sc. [7]
Don’t fill with fiberfill, flatten and close by crocheting both edges together with single crochet.
Fasten off and leave a long tail for sewing. Make a second one.
THE TRUNK
With grey yarn.
Rnd 1: work 4sc into a magic ring. [4]
Rnd 2: inc in each st around. [8]
Rnd 3 – 5: sc around. [8]
Rnd 6: 6sc, dec. [7]
Rnd 7: (sc, inc) x 3, inc. [11]
Rnd 8: sc, inc, 9sc. [12]
Rnd 9: (2sc, inc) x 4. [16]
Rnd 10: sc around. [16]
THE EARS (make 2)
Ear number 1:
With grey yarn.
Rnd 1: Work 6sc into a magic ring. [6]
Rnd 2: inc in each st around. [12]
Rnd 3: 2inc, 8sc, 2inc. [16]
Rnd 4: 2sc, (3sc in the same st) x 2, 3sc, 2inc, 3sc, (3sc in the same st) x 2, 2sc. [26]
Rnd 5: 3sc, (4sc in the same st), (3sc in the same st), 7sc, 2inc, 7sc, (3sc in the same st), (4sc in the same st), 3sc. [38]
Rnd 6: 7sc, (2hdc in the same st) x 3, 8sc, 2inc, 8sc, (2hdc in the same st) x 3, 7sc. [46]
Rnd 7: 8sc, (2hdc in the same st) x 4, 3hdc, 5sc, inc, sc, 2slst (make them loose) sc, inc, 5sc, 3hdc, (2hdc in the same st) x 4, 8sc. [56]
Rnd 8: 12sc, 5inc, 8sc, inc, 4slst (make them loose), inc, 8sc, 5inc, 12sc. [68]
Round 9: Fold in 2 and single crochet both edges together.
Fasten off and leave a long tail for sewing.
It’s normal that it’s a bit wavy, it gives movement to the elephant ears.
Ear number 2:
Repeat rounds 1 to 8. Don’t make round 9 yet.
Fasten off and leave a 2.4meter (95″) tail. Fold the ear in 2, and pull the yarn tail inside the fold to make it exit on the other side. Don’t pull too much but don’t make it too loose either.
Round 9: hold your ear upside down, and insert your hook through both edges so that the yarn tail exit the ear behind your hook (the yarn tail should be stuck between the fold and your hook). Single crochet both edges together from the bottom to the top of the ear.
This way, the nice single crochet border will face the same side to make the ears symetrical.
Fasten off and you should have a long enough tail for sewing.
THE LIFEBUOY
With red yarn. (We’re going to alternate 6 rounds in red, 4 rounds in white). The sl st used for colour change never count as a stitch.
Rnd 1: Work 6sc into a magic ring. [6]
Rnd 2-6: sc around. [6]
Stuff lightly with fiberfill. Change colour to white.
Rnd 7: sl st (tight), chain 1 (loose), 5sc. [6]
Rnd 8: skip the sl st, sc in the chain, 5sc. [6]
Rnd 9-10: sc around. [6]
Stuff lightly with fiberfill. Change colour to red.
Rnd 11: sl st (tight), chain 1 (loose), 5sc. [6]
Rnd 12: skip the sl st, sc in the chain, 5sc. [6]
Rnd 13-16: sc around. [6]
Stuff with fiberfill. Change colour to white.
Rnd 17: sl st (tight), chain 1 (loose), 5sc. [6]
Rnd 18: skip the sl st, sc in the chain, 5sc. [6]
Rnd 19-20: sc around. [6]
Stuff with fiberfill. Change colour to red.
Rnd 21: sl st (tight), chain 1 (loose), 5sc. [6]
Rnd 22: skip the sl st, sc in the chain, 5sc. [6]
Rnd 23-26: sc around. [6]
Stuff with fiberfill. Change colour to white.
Rnd 27: sl st (tight), chain 1 (loose), 5sc. [6]
Rnd 28: skip the sl st, sc in the chain, 5sc. [6]
Rnd 29-30: sc around. [6]
Stuff with fiberfill. Change colour to red.
Rnd 31: sl st (tight), chain 1 (loose), 5sc. [6]
Rnd 32: skip the sl st, sc in the chain, 5sc. [6]
Rnd 33-36: sc around. [6]
Stuff with fiberfill. Change colour to white.
Rnd 37: sl st (tight), chain 1 (loose), 5sc. [6]
Rnd 38: skip the sl st, sc in the chain, 5sc. [6]
Rnd 39-40: sc around. [6]
Fasten off, and sew to the first round.
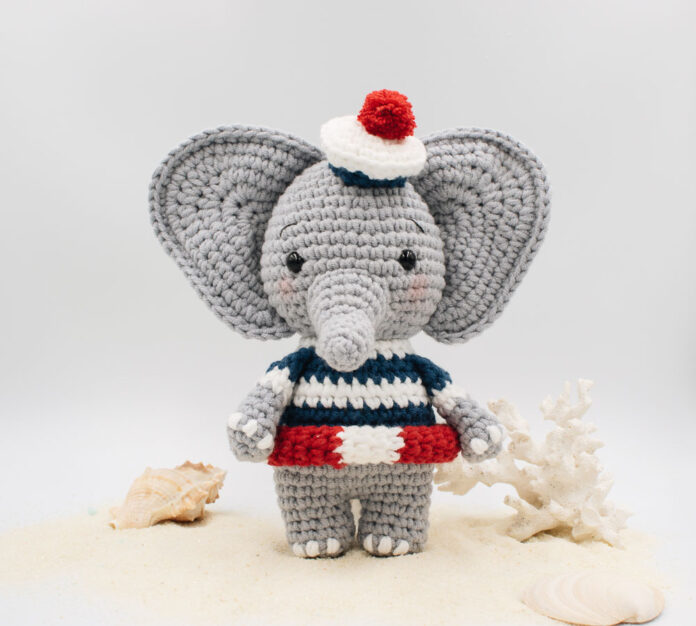
THE BERET
Start with white yarn.
Rnd 1: work 6 sc into a magic ring. [6]
Rnd 2: inc in each st around. [12]
Rnd 3: (sc, inc) x 6. [18]
Rnd 4: (2sc, inc) x 6. [24]
Rnd 5: in BLO, (2sc, dec) x 6. [18] (use normal decrease)
Change colour to navy blue.
Rnd 6: sl st (tight), chain 1 (loose), (sc, dec) x 5, 2sc. [13] (the sl st doesn’t count as a st)
Rnd 7: in FLO, sc around. [13]
Fasten off and leave a long tail for sewing.
The pompom
If you have a very small pom pom maker you can use it with red yarn, otherwise, just take a fork and follow the steps below.
Insert a piece of red yarn in the middle of the fork. Then wrap the yarn around the fork, around 15-20 times (depends on the yarn you’re using). Use the piece of yarn you left in the middle to make a very tight double knot around your wrap. Pull it out of the fork delicately, and with a very sharp pair of scissors, cut the loops (be careful not to cut the middle one with the knot). Then chop off your pom pom and equalize until you reach a nice round small little pom pom.
Use the tails to attach it tight to the top of the beret, before attaching the beret to the head.
PS: You could also just glue a red pom pom, just remember it’s not child safe, so make sure to notify your recipient to be cautious if they allow young kids to play with it.
THE TRUNK
With grey yarn.
Rnd 1: work 4sc into a magic ring. [4]
Rnd 2: inc in each st around. [8]
Rnd 3 – 5: sc around. [8]
Rnd 6: 6sc, dec. [7]
Rnd 7: (sc, inc) x 3, inc. [11]
Rnd 8: sc, inc, 9sc. [12]
Rnd 9: (2sc, inc) x 4. [16]
Rnd 10: sc around. [16]
THE TAIL
With grey yarn, make a slip knot, keeping a 15cm (6″) tail before the knot (to attach the tail to the body later). Chain 4. Fasten off, leaving again about 15cm (6″).
Cut 2 pieces of grey yarn of 20cm each (7.8″) and sew them through the last chain.
Then grab all the tails on the same side and holding the tails together, make one big knot. Pull it super tight and cut the tails short.
ASSEMBLY
I strongly recommend to use ball point pins for assembly. This way you are sure your piece won’t move during sewing and you save a lot of time and frustration.
1) Sew the trunk to the head.
2) Sew the head to the body.
3) Sew the ears to the head.
4) Sew the arms to the body between rounds 18 and 19 (so that the navy stripes match).
5) Sew the beret to the head.
6) Embroider the eyebrow
7) With white yarn, embroider the nails on the legs and arms.
8) Sew the tail to the back just below the first white round.
9) Don’t forget to slip the lifebuoy on Balthazar before he sets sail!
10) I like to add a little dot of blush on the cheeks below the eyes, I love the expression it gives to amigurumis!
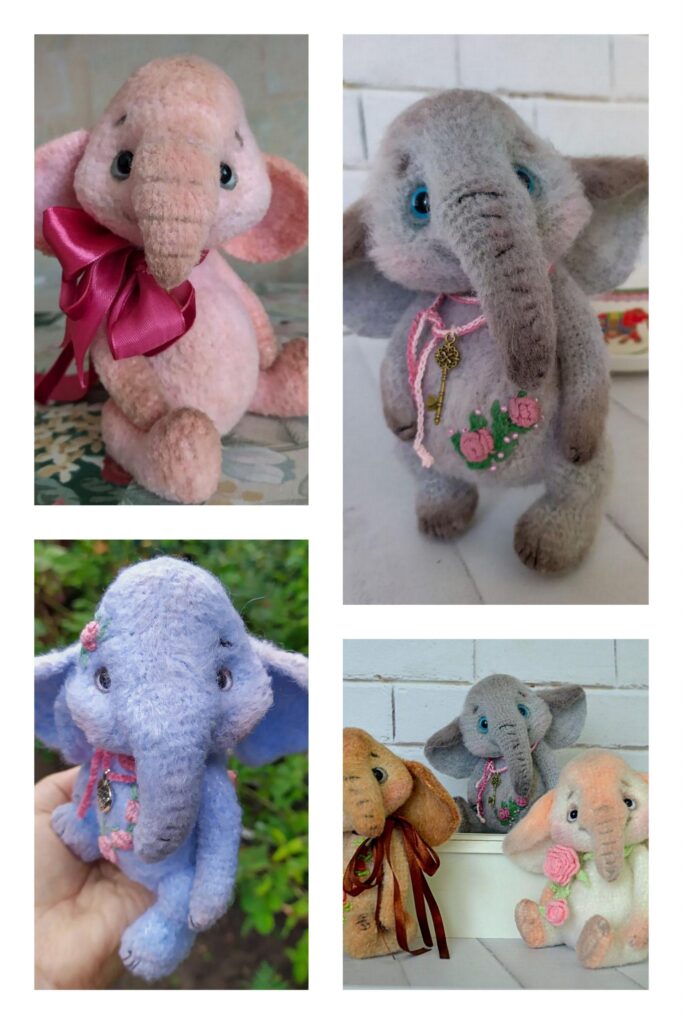
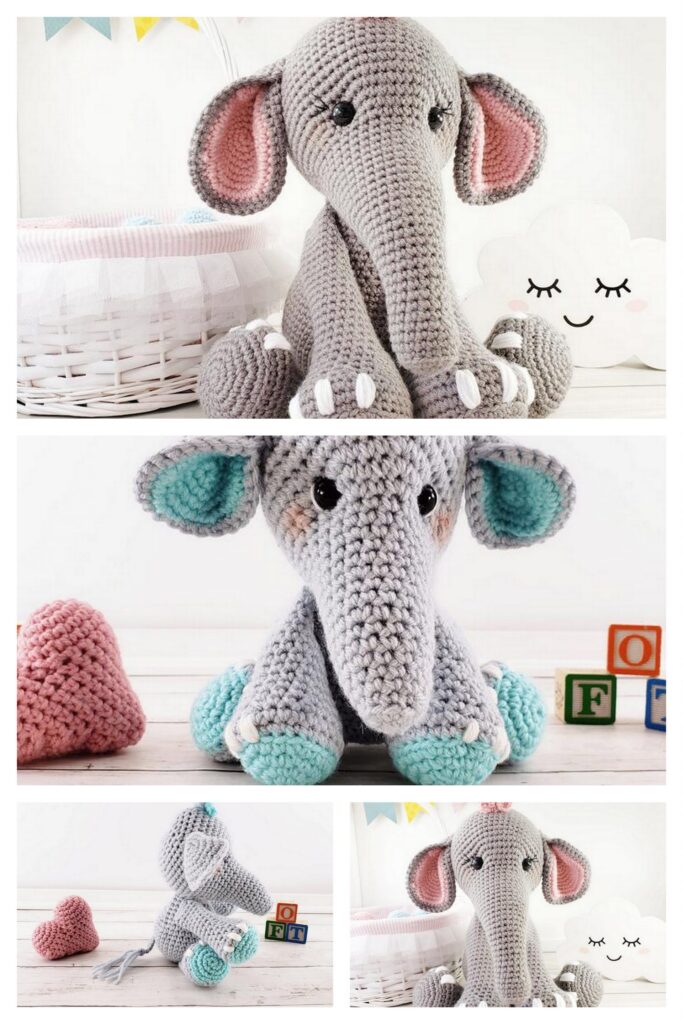
More Amigurumi Elephant Ideas: