MATERIAL
3.5mm / US E-4 crochet hook
2.5mm crochet hook
Yarn:
#4 / aran / worsted yarn, 8ply, 80% cotton 20% Milk Fiber, in white, black, yellow, straw, forest green and brown (I use a local shop yarn, an equivalent would be Paintbox Cotton Aran but keep the 3.5mm hook to obtain tight stitches and avoid gaps where the fiberfill shows)
DMC Cotton Perle N°8 shade 310 (black) to embroider the mouth and eyelashes
DMC Happy Cotton: shades 775 (black) for the arms, legs and antennae, shade 796 (light blue) for the watering can, 764 (pink) and 791 (dark red) for the flowers, 780 (green) for the leafs. This yarn is a #3 /DK-light 100% cotton, and use the 2.5mm hook.
A small piece of pink (or coral / orange) embroidery thread (or ply from a thicker yarn) to embroider a flower on the gardening apron.
Tapestry needle
Fiberfill
Stitch marker or a strand of thinner yarn
A pair of 8mm safety eyes
Ball point pins for assembly
Embroidery needle
Optional: you can insert pipe cleaners in the legs, just keep in mind it’s not child safe.
A small flower pot of 5cm (2″) diameter at the top.
LEVEL
Beginner to intermediate. The bee itself is worked only with single crochet, as well as the watering can and apron. The flowers and leafs use stitches such as hdc, dc, tr.
GAUGE AND SIZE
Advertisement
With the above material: 5-round circle = 5cm (2″). Find out how to measure gauge for amigurumis in my tutorial here.
With the material mentioned above and when gauge is achieved:
•The bee is 20cm tall (7.8″) from the feet to the top of the antennae
PATTERN NOTES AND SPECIAL TECHNIQUES
The number before the abbreviation represents how many times to work one type of stitch into consecutive stitches from the previous round (unless stated otherwise). Ex: 3inc = work one increase into each of the next 3 stitches.
This pattern is worked in continuous spiral rounds (i.e. without closing the rounds with a slip stitch) unless stated otherwise (the apron is worked in rows). It may help to mark the first stitch of each round with a stitch marker.
– Advertisement For amigurumi in general, I always use an invisible decrease (unless stated otherwise) to minimize the gaps between these stitches so that the fiberfill doesn’t show too much. You can check this simple technique in a video tutorial here, but if it’s too much hassle and you prefer to start right away you can also work with normal decrease, no big deal!
I use a great, easy, invisible colour change technique with no cut and sew, check the tutorial on my blog, or just use yours and replace the sl st and chain after the colour change by a normal single crochet.
STITCHES AND ABBREVIATIONS (US CROCHET TERMS)
st: stitch/es
sc: single crochet
hdc: half double crochet
sl st: slip stitch
inc: single crochet increase (work 2 sc into the same st)
dec: single crochet decrease (single crochet two stitches together).
dc: double crochet
tr: treble crochet
[number]: total number of stitches of the round
Rnd: round
(…) x 2: repeat whatever is in between the parenthesis the number of times indicated
in BLO: in the back loop only
in FLO: in the front loop only
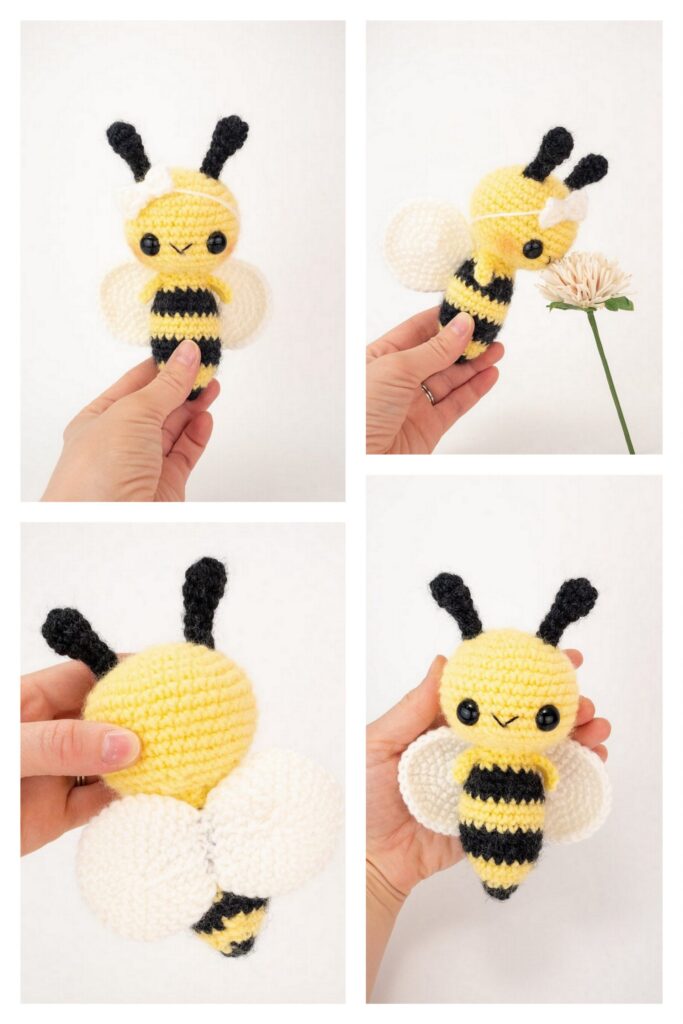
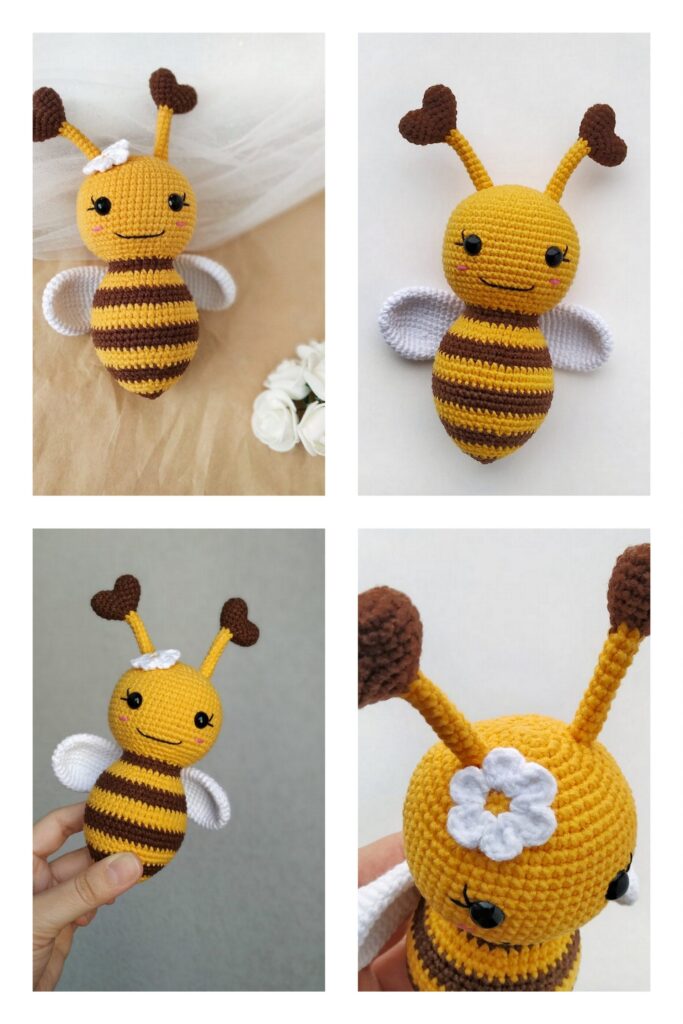
BETTY THE BEE AMIGURUMI PATTERN
THE BODY
With black yarn #4 (aran) and 3.5mm hook.
Rnd 1: Work 6sc into a magic ring. [6]
Rnd 2: inc in each st around. [12]
Rnd 3: (sc, inc) x 6. [18]
Rnd 4: (2sc, inc) x 6. [24]
Rnd 5: sc around. [24]
Change colour to yellow.
Rnd 6: sl st (tight), chain 1 (make it loose), 2sc, inc, (3sc, inc) x 5. [30] (the sl st doesn’t count as a st).
Rnd 7: skip the sl st, work your first sc in the chain, and sc in each st around. [30]
Change colour to black.
Rnd 8: sl st (tight), chain 1 (make it loose), 3sc, inc, (4sc, inc) x 5. [36] (the sl st doesn’t count as a st).
Rnd 9: skip the sl st, work your first sc in the chain, and sc in each st around. [36]
Change colour to yellow.
Rnd 10: sl st (tight), chain 1 (make it loose), 35sc. [36]. (The sl st doesn’t count as a st).
Rnd 11: skip the sl st, work your first sc in the chain, and sc in each st around. [36]
Change colour to black.
Rnd 12: sl st (tight), chain 1 (make it loose), 3sc, dec, (4sc, dec) x 5. [30] (The sl st doesn’t count as a st).
Rnd 13: skip the sl st, work your first sc in the chain, and sc in each st around. [30]
Change colour to yellow.
Rnd 14: sl st (tight), chain 1 (make it loose), 2sc, dec, (3sc, dec) x 5. [24]. (The sl st doesn’t count as a st).
Rnd 15: skip the sl st, work your first sc in the chain, and sc in each st around. [24]
Change colour to black.
Rnd 16: sl st (tight), chain 1 (make it loose), sc around. [24]. (The sl st doesn’t count as a st).
Rnd 17: skip the sl st, work your first sc in the chain, and sc in each st around. [24]
Change colour to yellow.
Rnd 18: sl st (tight), chain 1 (make it loose), sc, dec, (2sc, dec) x 5. [18]. (The sl st doesn’t count as a st).
Rnd 19: skip the sl st, work your first sc in the chain, and sc in each st around. [18]
Fasten off, and leave a long tail to sew to the head later. Fill with fiberfill.
THE HEAD
With yellow yarn.
Rnd 1: Work 6sc into a magic ring. [6]
Rnd 2: inc in each st around. [12]
Rnd 3: (sc, inc) x 6. [18]
Rnd 4: (2sc, inc) x 6. [24]
Rnd 5: (3sc, inc) x 6. [30]
Rnd 6: sc in each st around. [30]
Rnd 7: (4sc, inc) x 6. [36]
Rnd 8: sc in each st around. [36]
Rnd 9: (5sc, inc) x 6. [42]
Rnd 10-14: sc in each st around [42]
Insert safety eyes between round 11 and 12, with 6 stitches between the 2 eyes.
Rnd 15: (5sc, dec) x 6. [36]
Rnd 16: (4sc, dec) x 6. [30]
Rnd 17: (3sc, dec) x 6. [24]
Rnd 18: (2sc, dec) x 6. [18]
Stuff firmly with fiberfill.
Rnd 19: (sc, dec) x 6. [12]
Rnd 20: 6dec. [6]
Finish stuffing firmly, fasten off and sew closed. (You’re not sure how to sew closed nicely? I’ve got you covered, check this tutorial on my blog).
THE ARMS (make 2)
With DMC Happy Cotton black yarn and 2.5mm hook.
Rnd 1: Work 5sc into a magic ring. [5]
Rnd 2: inc in each st around. [10]
Rnd 3: (sc, dec) x 3, sc. [7]
Rnd 4: dec, sc, dec, 2sc. [5]
Rnd 5 – 10: sc around. [5]
Don’t fill, fasten off and leave a long tail for sewing. Make a second one.
THE LEGS (make 2)Also with DMC Happy cotton black yarn and 2.5mm hook. The legs are the same as the arms, except you stop after round 9 (instead of 10).
You can fill the legs very lightly or insert a pipe cleaner (just keep in mind it’s not child safe).
THE ANTENNAE (make 2)
Again with DMC Happy Cotton black yarn and 2.5mm hook.
Rnd 1: Work 6sc into a magic ring. [6]
Rnd 2: inc in each st around. [12]
Rnd 3: (2sc, dec) x 3. [9]
Rnd 4: sc around. [9]
Rnd 5: (sc, dec) x 3. [6]
Fill slightly with fiberfill
Rnd 6: sc, dec, 3sc. [5]
Rnd 7 – 12: sc around. [5]
Fasten off, leave a long tail for sewing, and fill very lightly or insert a pipe cleaner (just keep in mind it’s not child safe).
THE WINGS (make 2)
Rnd 1: Work 6sc into a magic ring. [6]
Rnd 2: (sc, inc) x 3. [9]
Rnd 3: (2sc, inc) x 3. [12]
Rnd 4: (3sc, inc) x 3. [15]
Rnd 5: (4sc, inc) x 3. [18]
Rnd 6– 7: sc around. [18]
Rnd 8: (4sc, dec) x 3. [15]
Rnd 9: sc around. [15]
Rnd 10: (3sc, dec) x 3. [12]
Rnd 11: sc around. [12]
Rnd 12: (2sc, dec) x 3. [9]
Rnd 13 – 14: sc around. [9]
Don’t fill, flatten and close by crocheting both edges together with 4sc.
Fasten off and leave a long tail for sewing. Make a second one.
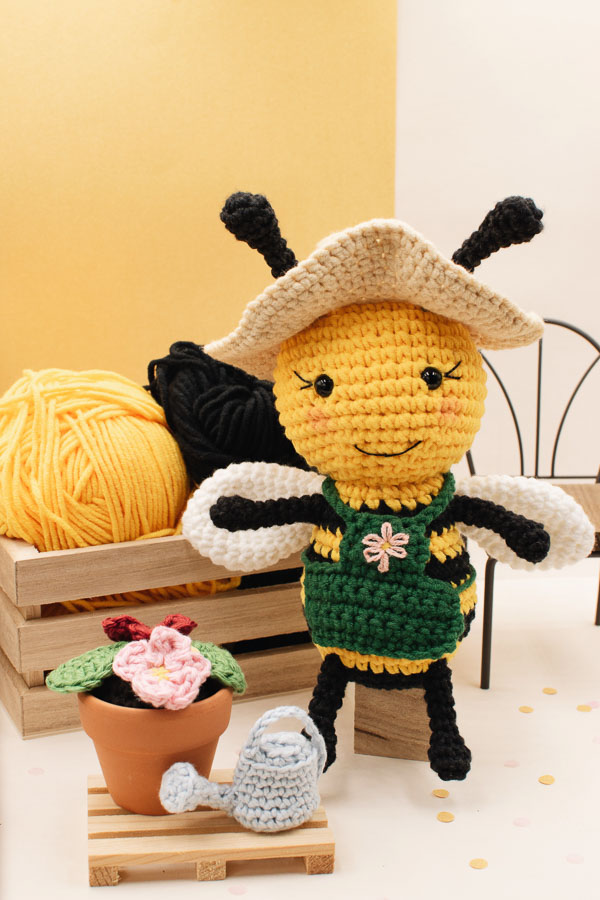
THE HAT
Rnd 1: work 6sc into a magic ring. [6]
Rnd 2: inc in each st around. [12]
Rnd 3: (sc, inc) x 6. [18]
Rnd 4: (2sc, inc) x 6. [24]
Rnd 5: in BLO, sc around. [24]
Rnd 6: (7sc, inc) x 3. [27]
Rnd 7: (8sc, inc) x 3. [30]
Rnd 8 – 9: sc around. [30]
Rnd 10: 10sc, chain 3, skip 2, 6 sc, chain 3, skip 2, 10sc. [32]
Rnd 11: In FLO, (4sc, inc) x 6, 2sc. [38]
Rnd 12: (3sc, inc) x 9, 2sc. [47]
Rnd 13: (inc, sc) x 2, 16sc, (inc, sc) x 4, 15sc, (inc, sc) x 2. [55]
Rnd 14: (7sc, inc) x 6, 6sc, inc. [62]
Rnd 15: (6sc, inc) x 8, 6sc. [70]
Rnd 16: 3sc, inc, (7sc, inc) x 7, 10sc. [78]
Fasten off, leave a long tail, and make an invisible finish.
Invisible finish: fasten off and pull the yarn end totally through the last st. Thread the tapestry needle, skip the first stitch of the previous round and insert it under both loops of the second stitch. Pull the yarn through, and insert it back where it came from, in the middle of the last stitch of the last round (under the back loop only). Pull gently until this fake stitch is the same size than the other stitches, and hide the yarn end under the hat by weaving it in. It minimizes the height difference with a neat finish.
Then weave the rest of the yarn end towards the center of the hat, to be able to sew it to the head later during assembly.
THE WATERING CAN
Yarn: DMC happy cotton shade 796 (light blue), with a 2.5mm crochet hook.
The watering can is worked in 3 pieces: the main part, the spout and the handle.
Main part
Rnd 1: work 6sc into a magic ring. [6]
Rnd 2: inc in each st around. [12]
Rnd 3: inc, 3sc, 2inc, 5sc, inc. [16]
Rnd 4: in BLO, sc in each st around. [16]
Rnd 5: sc around. [16]
Rnd 6: dec, 6sc, dec, 6sc. [14]
Rnd 7 – 9: sc around. [14]
Rnd 10: in BLO, (dec, sc) x 4, dec. [9]
Fasten off and weave in end.
The spout
Rnd 1: work 6sc into a magic ring. [6]
Rnd 2: 6sc. [6]
Rnd 3: in BLO, (sc, dec) x 2. [4]
Rnd 4 – 6: sc around. [4]
Fasten off and leave a tail for sewing.
The handle
Chain 16. Fasten off, and leave a tail for sewing.
Assembly of the watering can
Sew the spout to the bottom, so that it forms a 45° angle with the can.
Sew the handle to the bottom of the main part on one side, and to the opposite side on the top.
ASSEMBLY OF THE BEE
I strongly recommend to use ball point pins for assembly. This way you are sure your piece won’t move during sewing and you save a lot of time and frustration.
Assemble the bee before crocheting the apron, as it will be attached directly around its neck in the making.
1- Sew the head to the body.
2- Place the hat on the head, don’t sew it yet. Use ball point pins to mark where the antennae should be sewn. Remove the hat, and sew the antennae to the head.
3- Sew the legs and arms to the body. You can insert pipe cleaners but keep in mind that it’s not child safe, so make sure that your customers or recipient are aware of it.
4- Attach the hat to the head with a few stitches at the basis of the hat on each side.
5- Sew the wings to the back with a slight angle so that they are pointing a bit downwards.
6- Embroider the mouth and eyelashes. Do spend time to find the right spot and shapes, these details change the whole expression of your ami, hence the final look. I also like to put a little tiny bit of blush on the cheeks.
THE GARDENING APRON
With forest green yarn and 3.5mm hook. The apron is worked in rows.
Chain 12.
Row 1: In second chain from the hook, sc in each stitch. [11]
Row 2 – 5: chain 1, turn, sc in each st. [11]
Fasten off, leaving a long tail to attach the apron at the back later.
Row 6: with a new strand of green yarn, make a slip knot, and insert your hook in the 4th stitch of the last row. Work 5 sc. [5]
Row 7 – 8: chain 1, turn, sc in each st. [5]
Row 9: chain 1, turn, dec, sc, dec. [3]
Don’t fasten off. Chain 26. Before attaching the apron to the bee, embroider a flower (or any other idea you like!) on the upper part of the apron, it will be much easier now than once attached to the bee’s neck.
Place the apron on the bee and the 26 chains around her neck to check the length: adjust the number of chains depending on your tension. Join to the top of the apron on the other side with a sl st. Weave in ends, except the tail from row 5. Attach a new strand of yarn on the other side of row 5, to be able to tie a knot at the back.
THE FLOWERS AND POT
Flowers and leaves: with DMC happy cotton shade 764 (pink) and 791 (dark red) for the flowers, 780 (green) for the leafs and a 2.5mm hook.
Soil: with dark brown worsted yarn and a 3.5mm hook.
Pot: I used a real small flower pot with a 5cm (2″) diameter opening at the top.
The soil
Rnd 1: work 6sc into a magic ring. [6]
Rnd 2: inc in each st around. [12]
Rnd 3: (sc, inc) x 6. [18]
Rnd 4: (2sc, inc) x 6. [24]
Rnd 5 – 6 : sc in each st around. [24]
Rnd 7: (2sc, dec) x 6. [18]
Rnd 8: sc in each st around. [18]
Rnd 9: (sc, dec) x 6. [12]
Stuff with fiberfill.
Rnd 10: 6dec. [6]
Fasten off and sew closed.
Alternatively, you can also do the soil with a piece of brown felt. Sometimes I like when all elements are not 100% crochet made. It gives different textures.
To make the soil with felt, use a square (or round) piece of approximately 3 times your pot diameter (at the top). With a sewing needle and sewing thread, sew a couple of stitches in a round shape close to the edges, and close it by pulling on the thread, after inserting fiberfill inside. You’ll need the sewing needle and thread to sew the leaves and flowers to the soil as well. Make sure to close it tight enough so that the fiberfill cannot come out. For this reason it’s safer to crochet the soil if it’s destined to kids.
The flowers (make 2)
Rnd 1: Work 5sc into a magic ring. [5]
Rnd 2: (sl st in next st, chain 2, 3dc in same st, chain 2, sl st in same st) x 5.
You should end up with 5 petals.
Fasten off, leave a tail for sewing (if you are using the crocheted soil, otherwise just weave in ends at the back and you’ll sew it to the felted soil with a sewing thread and sewing needle).
With a yellow strand of yarn (you can split the plies of your yellow yarn to obtain a thinner one), embroider the center of the flower like an asterisk.
Make a second one with another colour.
The leaves (make 2)
The leaves are worked around the chain.
Make a slip knot, leaving a long enough tail for sewing, and chain 9.
Rnd 1: Starting in 2nd chain from the hook, sc, hdc, 2dc, 2tr, dc, hdc. Turn and keep going on the other side of the chain: hdc, dc, 2tr, dc, hdc, 2sl st.
Fasten off and weave in yarn tail.
Make a second one.
If you are using the crocheted soil, sew the leaves to the soil using the yarn tail. Otherwise use a sewing thread and sewing needle.
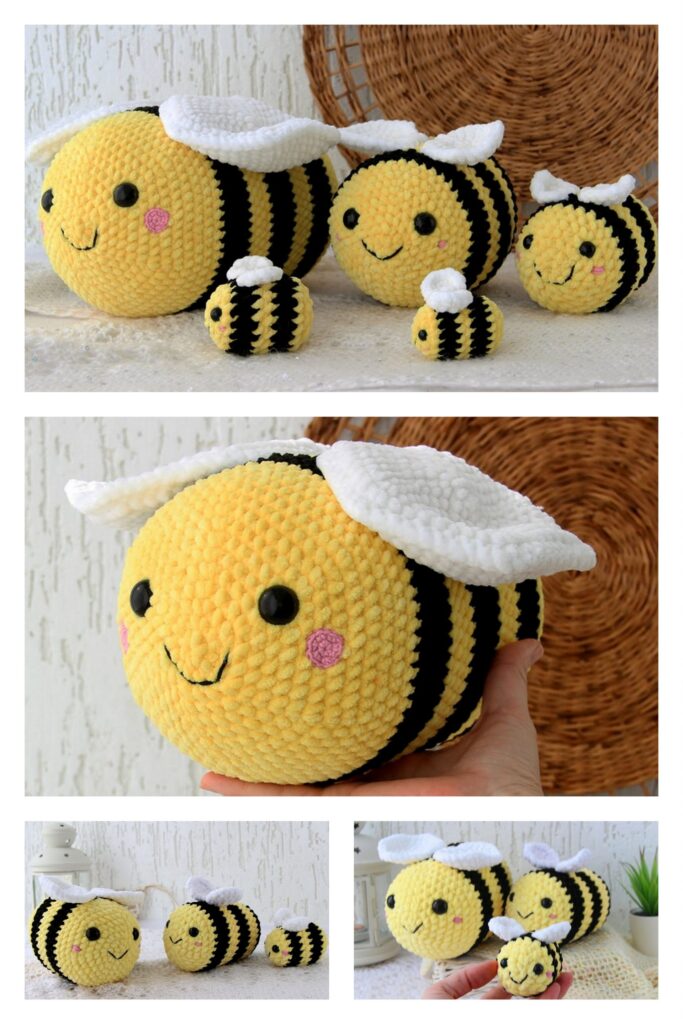
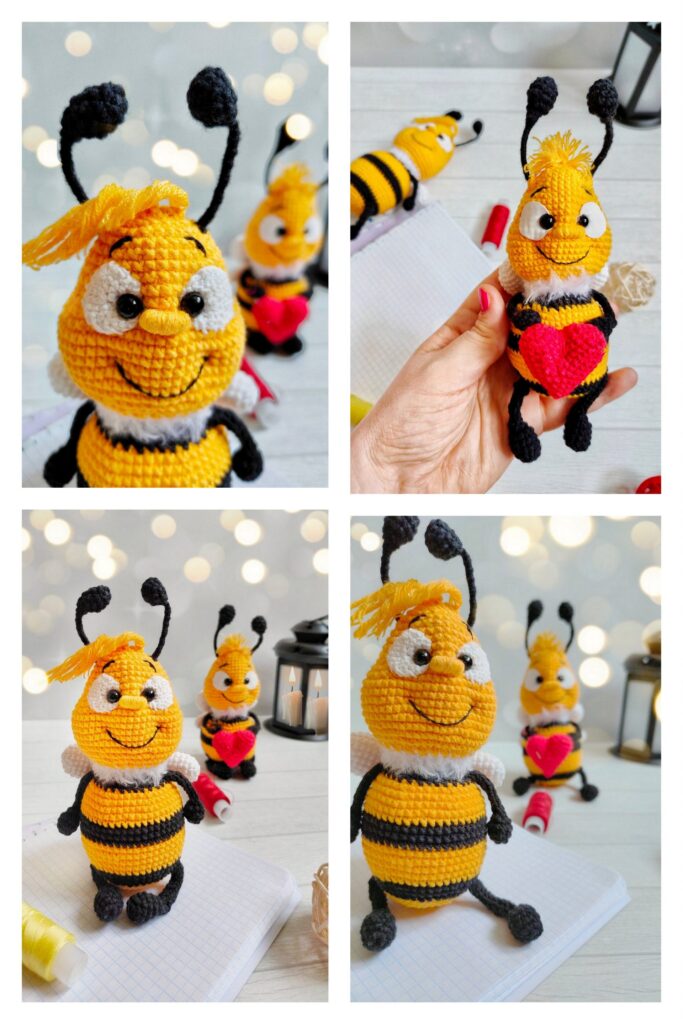
More Amigurumi Bee Ideas: