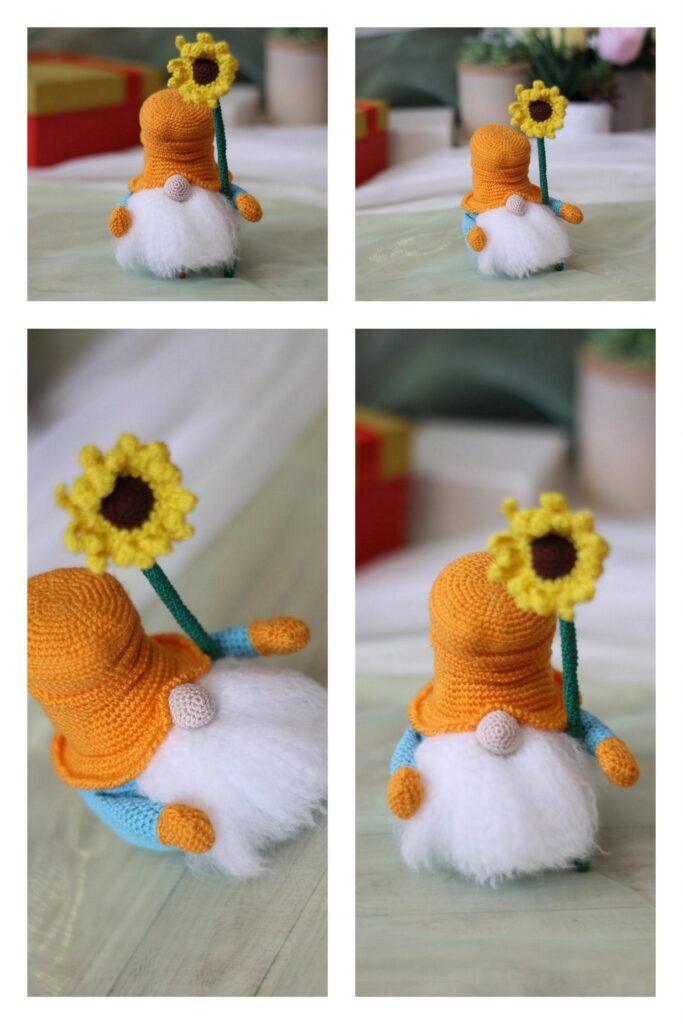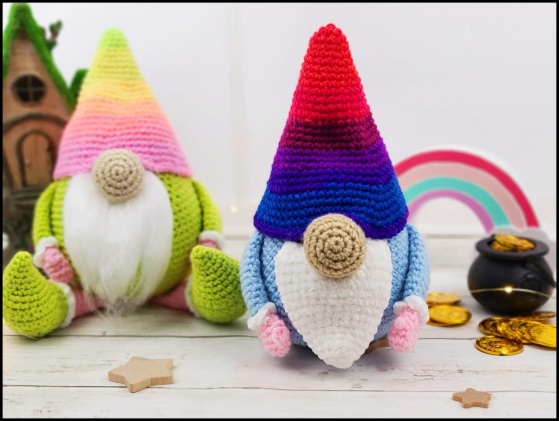
Size:
15 inches from bottom to top of hat with weight 4 yarn and a 3.25 mm hook
Skill Level Needed:
Intermediate- suitable for novice crocheters, requires patience and precisions when assembling
the gnome and basic crochet skills.
Contact Info:
If you have any questions or concerns about this pattern, please do not hesitate to contact me.
I will get back to you within 24 hours.
Materials Needed:
Yarn: Worsted Weight #4, approximately 100g of main color, 50-75g of accent colors
Color A: Body color, Color B: Hat color, Color C: Nose color, Color D: Mitten color, Color E:
White
Hook Size: D Hook or 3.25 mm
Scissors, sewing needle, stitch marker, fiberfill stuffing
Abbreviations:
mr= magic ring- crochet single crochet stitches in to the
adjustable loop
BLO= back loops only
ch= chain stitch
inc3= 3 sc in the same stitch
sc= single crochet stitch
F/O= Fasten off
sl= slip stitch
dc= double crochet stitch
inc= increase- make two single crochet stitches in the same stitch
dec=decrease- crochet two stitches together using the decrease method
(4 sc, inc) x 6= repeat the pattern between parentheses 6 times
Notes:
• Do not join rounds unless stated, work in a continuous spiral
• Use a stitch marker to mark the beginning of each round
• All stitches are worked in both loops unless stated otherwise in the pattern
Body:
Crocheted from bottom to top of body
With Color A:
1- Make 6 sc into a magic ring= 6
2- Increase in each st around= 12
3- (sc, inc) x 6= 18
4- (2 sc, inc) x 6= 24
5- (3 sc, inc) x 6= 30
6- (4 sc, inc) x 6= 36
7- (5 sc, inc) x 6= 42
8- BLO (6 sc, inc) x 6= 48
9- (7 sc, inc) x 6= 54
10- (8 sc, inc) x 6= 60
11- (9 sc, inc) x 6= 66
12-15. sc in each st around
16- (20 sc, dec) x 3= 63
17- sc in each st around
18- (19 sc, dec) x 3= 60
19- (18 sc, dec) x 3= 57
20- sc in each st around
21- (17 sc, dec) x 3= 54
22- (16 sc, dec) x 3= 51
cut a cardboard circle approximately 3 ½ inches diameter around, insert in the bottom of the body if you want the bottom to stay flatter
23- sc in each st around
24- (15 sc, dec) x 3= 48
25- sc in each st around
26- (14 sc, dec) x 3= 45
27- sc in each st around
Start stuffing the body
28- (13 sc, dec) x 3= 42
29- sc in each st around
30- (12 sc, dec) x 3= 39
Body:
31- BLO sc in each st around
32- (11 sc, dec) x 3= 36
33- (10 sc, dec) x 3= 33
34- (9 sc, dec) x 3= 30
35- (3 sc, dec) x 6= 24
36- (2 sc, dec) x 6= 18
37- (sc, dec) x 6= 12
38- dec x 6= 6
F/O and sew the hole closed
Hat:
With Color B:
1- Make 6 sc into a magic ring= 6
2- (inc, 2 sc) x 2= 8
3- (inc, 3 sc) x 2= 10
4- sc in each st around
5- (inc, 4 sc) x 2= 12
6- (inc, 3 sc) x 3= 15
7- sc in each st around
8- (inc, 4 sc) x 3= 18
9- sc in each st around
I did not stuff my hat
10- (inc, 5 sc) x 3= 21
11- (inc, 6 sc) x 3= 24
12- sc in each st around
13- (inc, 7 sc) x 3= 27
14- (inc, 8 sc) x 3= 30
15- sc in each st around
16- (inc, 9 sc) x 3= 33
17- (inc, 10 sc) x 3= 36
18- sc in each st around
19- (inc, 11 sc) x 3= 39
20- (inc, 12 sc) x 3= 42
21- sc in each st around
22- (inc, 13 sc) x 3= 45
23- (inc, 14 sc) x 3= 48
24- sc in each st around
25- (inc, 15 sc) x 3= 51
26- (inc, 16 sc) x 3= 54
27. Sc in each st around
28. (inc, 17 sc) x 3= 57
29. (inc, 18 sc) x 3= 60
30. Sc in each st around
F/O and leave a long tail for sewing
Arms (Make 2):
Starting with color D:
Right Arm:
1- Make 6 sc into a magic ring= 6
2- Increase in each st around= 12
3- sc in each st around
4- 4 dc cluster, ch 1, 11 sc= 12
See pg.15 for help with the cluster st
5- (do not work off the ch 1 from the previous round)
(4 sc, dec) x 2= 10
Change to Color E:
6- FLO sc in each st around
Change to Color A:
7- BLO sc in each st around
8-10. sc in each st around
11- Dec, 8 sc= 9
12-14. sc in each st around
15- Dec, 7 sc= 8
16-17. sc in each st around
18- Work 3 sc, fold the arm in half and sc the opening closed. F/O and leave a long tail for sewing.
Starting with Color D:
Left Arm:
1. Make 6 sc into a magic ring= 6L
2. Increase in each st around= 12
3. Sc in each st around
4. 11 sc, ch 1, 4 dc cluster= 12
See pg. 15 for help with the cluster st
5. (do not work off the ch 1 from the previous round)
(4 sc, dec) x 2= 10
Change to Color E:
6. FLO sc in each st around
Change to Color A:
7. BLO sc in each st around
8-10. Sc in each st around
11. Dec, 8 sc= 9
12-14. Sc in each st around
15. Dec, 7 sc= 8
16-17. Sc in each st around
18. Work 3 sc, fold the arm in half and sc the opening closed. F/O and leave a long tail for sewing.
Nose:
With Color C:
1- Make 6 sc into a magic ring= 6
2- Increase in each st around= 12
3- (sc, inc) x 6= 18
4- (2 sc, inc) x 6= 24
5- sc in each st around
6- (2 sc, dec) x 6= 18
7- (sc, dec) x 6= 12
8- dec x 6= 6
F/O and leave a long tail for sewing
Legs (Make 2):
Starting with Color A:
1- Make 4 sc into a magic ring= 4
2- Inc, sc, dec= 4
3- inc x 2, 2 sc= 6
4- inc x 2, 4 sc= 8
5- inc x 2, 6 sc= 10
6- inc x 2, 8 sc= 12
7- sc in each st around
8- (sc, inc) x 6= 18
9- sc in each st around, work 6 sc more to move the stitch marker
10- Ch 1, work 16 sc
11- Ch 1, turn, work 16 sc
12- Ch 1, turn, 6 sc, dec x 2, 6 sc= 14
13- Ch 1, turn, dec, 3 sc, 4 hdc, 3 sc, dec= 12
14- Ch 1, turn, dec, 3 sc, 2 hdc, 3 sc, dec= 10
15- Ch 1, turn, dec, 6 sc, dec= 8
16- Ch 1, turn, dec, 4 sc, dec= 6
17- Ch 1, work 18 sc. Work the sc on the sides of the foot, across the front, and on the top of the foot.
18-sc in each st around
Start stuffing the foot
Legs Continued:
19- (4 sc, dec) x 3= 15
Change to Color E:
20- FLO sc in each st around
Change to Color D:
21- work in Back loops from round 20: sc in each st around
22-23. sc in each st around
24- Dec, 13 sc= 14
25-27. sc in each st around
28- (5 sc, dec) x 2= 12
Stop stuffing the legs
29-31. sc in each st around
32- (4 sc, dec) x 2= 10
33-35. sc in each st around
F/O and leave a long tail for sewing
Beard (Optional):
With Color E:
1- Make 6 sc into a magic ring= 6
2- (sc, inc) x 3= 9
3- (2 sc, inc) x 3= 12
4- sc in each st around
Do not stuff the beard
5- (3 sc, inc) x 3= 15
6- (4 sc, inc) x 3= 18
7- sc in each st around
8- (5 sc, inc) x 3= 21
9- (6 sc, inc) x 3= 24
10- (7 sc, inc) x 3= 27
11-12. sc in each st around
13- (8 sc, inc) x 3= 30
14-16. sc in each st around
Fold the beard in half and sc the opening closed.
Assembly
Head and Body:
1- If you crocheted the beard. Place the beard approximately between rounds 27 and 28 of the body. Sew the beard onto the face.
2- If you want the brushed beard look. Attach a row of double stranded yarn approximately between rounds 27 and 28. You will want 18 strands of white yarn cut approximately 6 inches in length. Make one row. Then repeat 2 more rows underneath that first row. Brush the yarn out with a wire pet brush. You will lose a lot of yarn during this process.
Nose:
1- Pin the nose above your beard.
2- Sew the nose onto the body.
Hat:
1- Pin the hat onto the head going around the nose.
2- Sew the hat onto the head but not onto the nose.
Arms:
1- Pin the arms onto the side of the body.
2- Sew the arms onto the body.
Legs:
1- Turn the body upside down and pin the legs onto the bottom of the body.
2- Sew the legs onto the body.
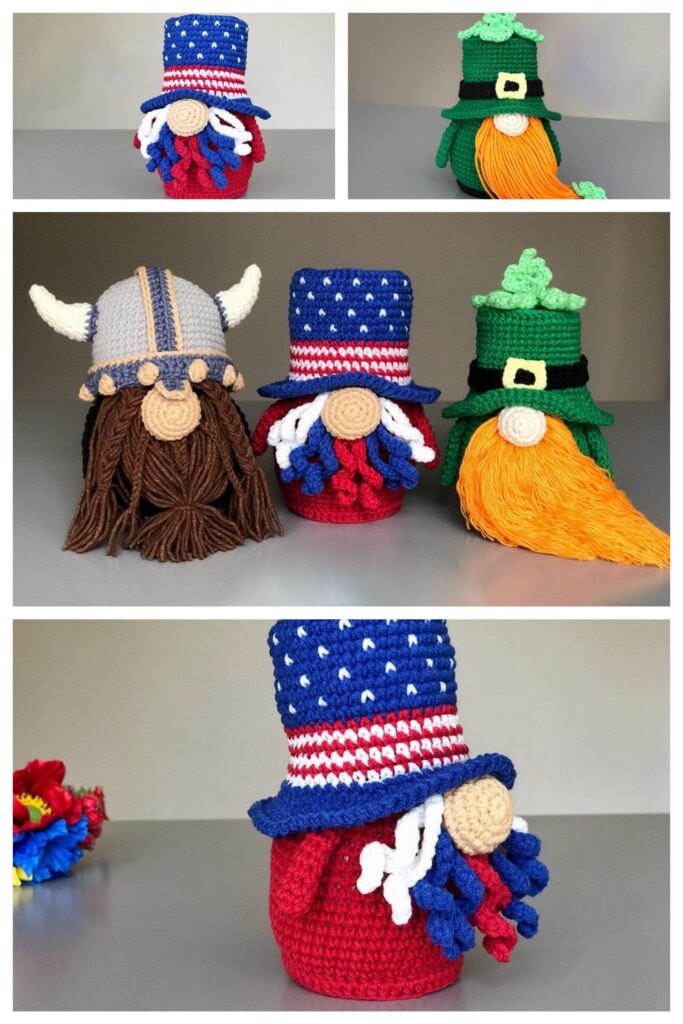
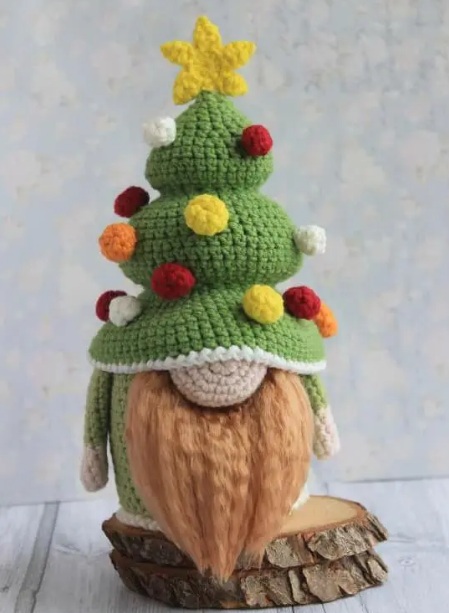
Congratulations
More Amigurumi Gnome Ideas